
Of all the days we could have done that, we had to pick the one day when it did not rain: it poured! And I am talking buckets, really big buckets of rain. That’s the one day in the whole month of September I was in Italy visiting my family that my aunt Luciana, my cousin Lorena and I picked for our little outing to the nearby and lovely Swiss town of Lugano. The Swiss border is just a few miles from my family’s home, and trips into Switzerland are quite the norm, like Canada is for people in Buffalo, NY.
.
.
It was the one day that worked for all three of us, and it was to be a little time-out to cambiare l’aria (change the air), have lunch at one of our favorite places, window-shop… you know, girls’ stuff like that. It turned out that what we did most was splish-splash in and out of gigantic puddles, ponds more like, open and close umbrellas and strongly wish to manifest rain boots. At one point both umbrella and store-front awnings were not sufficient to keep us dry, as the heavens opened up and all the rain in the universe came down just as we were crossing an open patch. This added another interesting activity to the list: brushing water off each other’s backs to avoid our clothes getting soaked. I must admit we laughed a lot!
.
.
You are probably wondering what this story has to do with the lovely tartlets in the images I am showing you. Bear with me a little longer because it does.
After enjoying a truly excellent light lunch at a lakefront restaurant, we adventured out again in the rain to walk the town center and browse the shops. Because of the intense rain I was glad not to have brought my beloved (big and heavy) camera with me (for once), and bummed at the same time because of the excellent lunch and what came after.
.
.
All that splish-splashing and opening and closing of umbrellas was exhausting and, after quite a bit of that, we figured we needed a reward.
Ehm… no, that is not quite how it went. The way it happened is: as we walked along the Via Pessina in the old part of town, my eyes and my entire being were suddenly and powerfully drawn to one of the most beautiful patisserie display windows I had ever seen. THAT’s when I wished I had my camera! I did snap a few pics with my then iPhone4 but… but, but… it is just not the same, and certainly not worthy of a post.
Without saying a word, I lead the way inside, totally mesmerized and eager to discover more.
.
.
The place was very busy, as we were obviously not the only ones thinking we needed a reward for dealing with the rain. I turned right and headed for the long counter which was filled with an even richer assortment of goodies than I had seen in the window. There were at least thirty-some different mini desserts (how could I ever choose?!), then there were cakes, gugelhupfs (bundt cakes), cookies, biscuits, chocolate truffles, madeleines…. This is a Swiss patisserie, so influenced by the best of the countries that surround it: Italy, France and Germany. Can you imagine?
When my turn came I had to restrain myself, and only picked five mini desserts to take home, making sure they were all different from one another, thinking of my camera and my mom – who would be a very eager sampling volunteer once I was done with all the photos. Alas, between the walk all the way back to the parking lot (yes it continued to rain), a couple of shopping stops, and the drive back to Italy, a couple of the desserts got a little smooshed (yes I make up words sometimes, feel free to adopt this one), so not photo worthy. I photographed the other three, which I will share with you by and by.
.
.
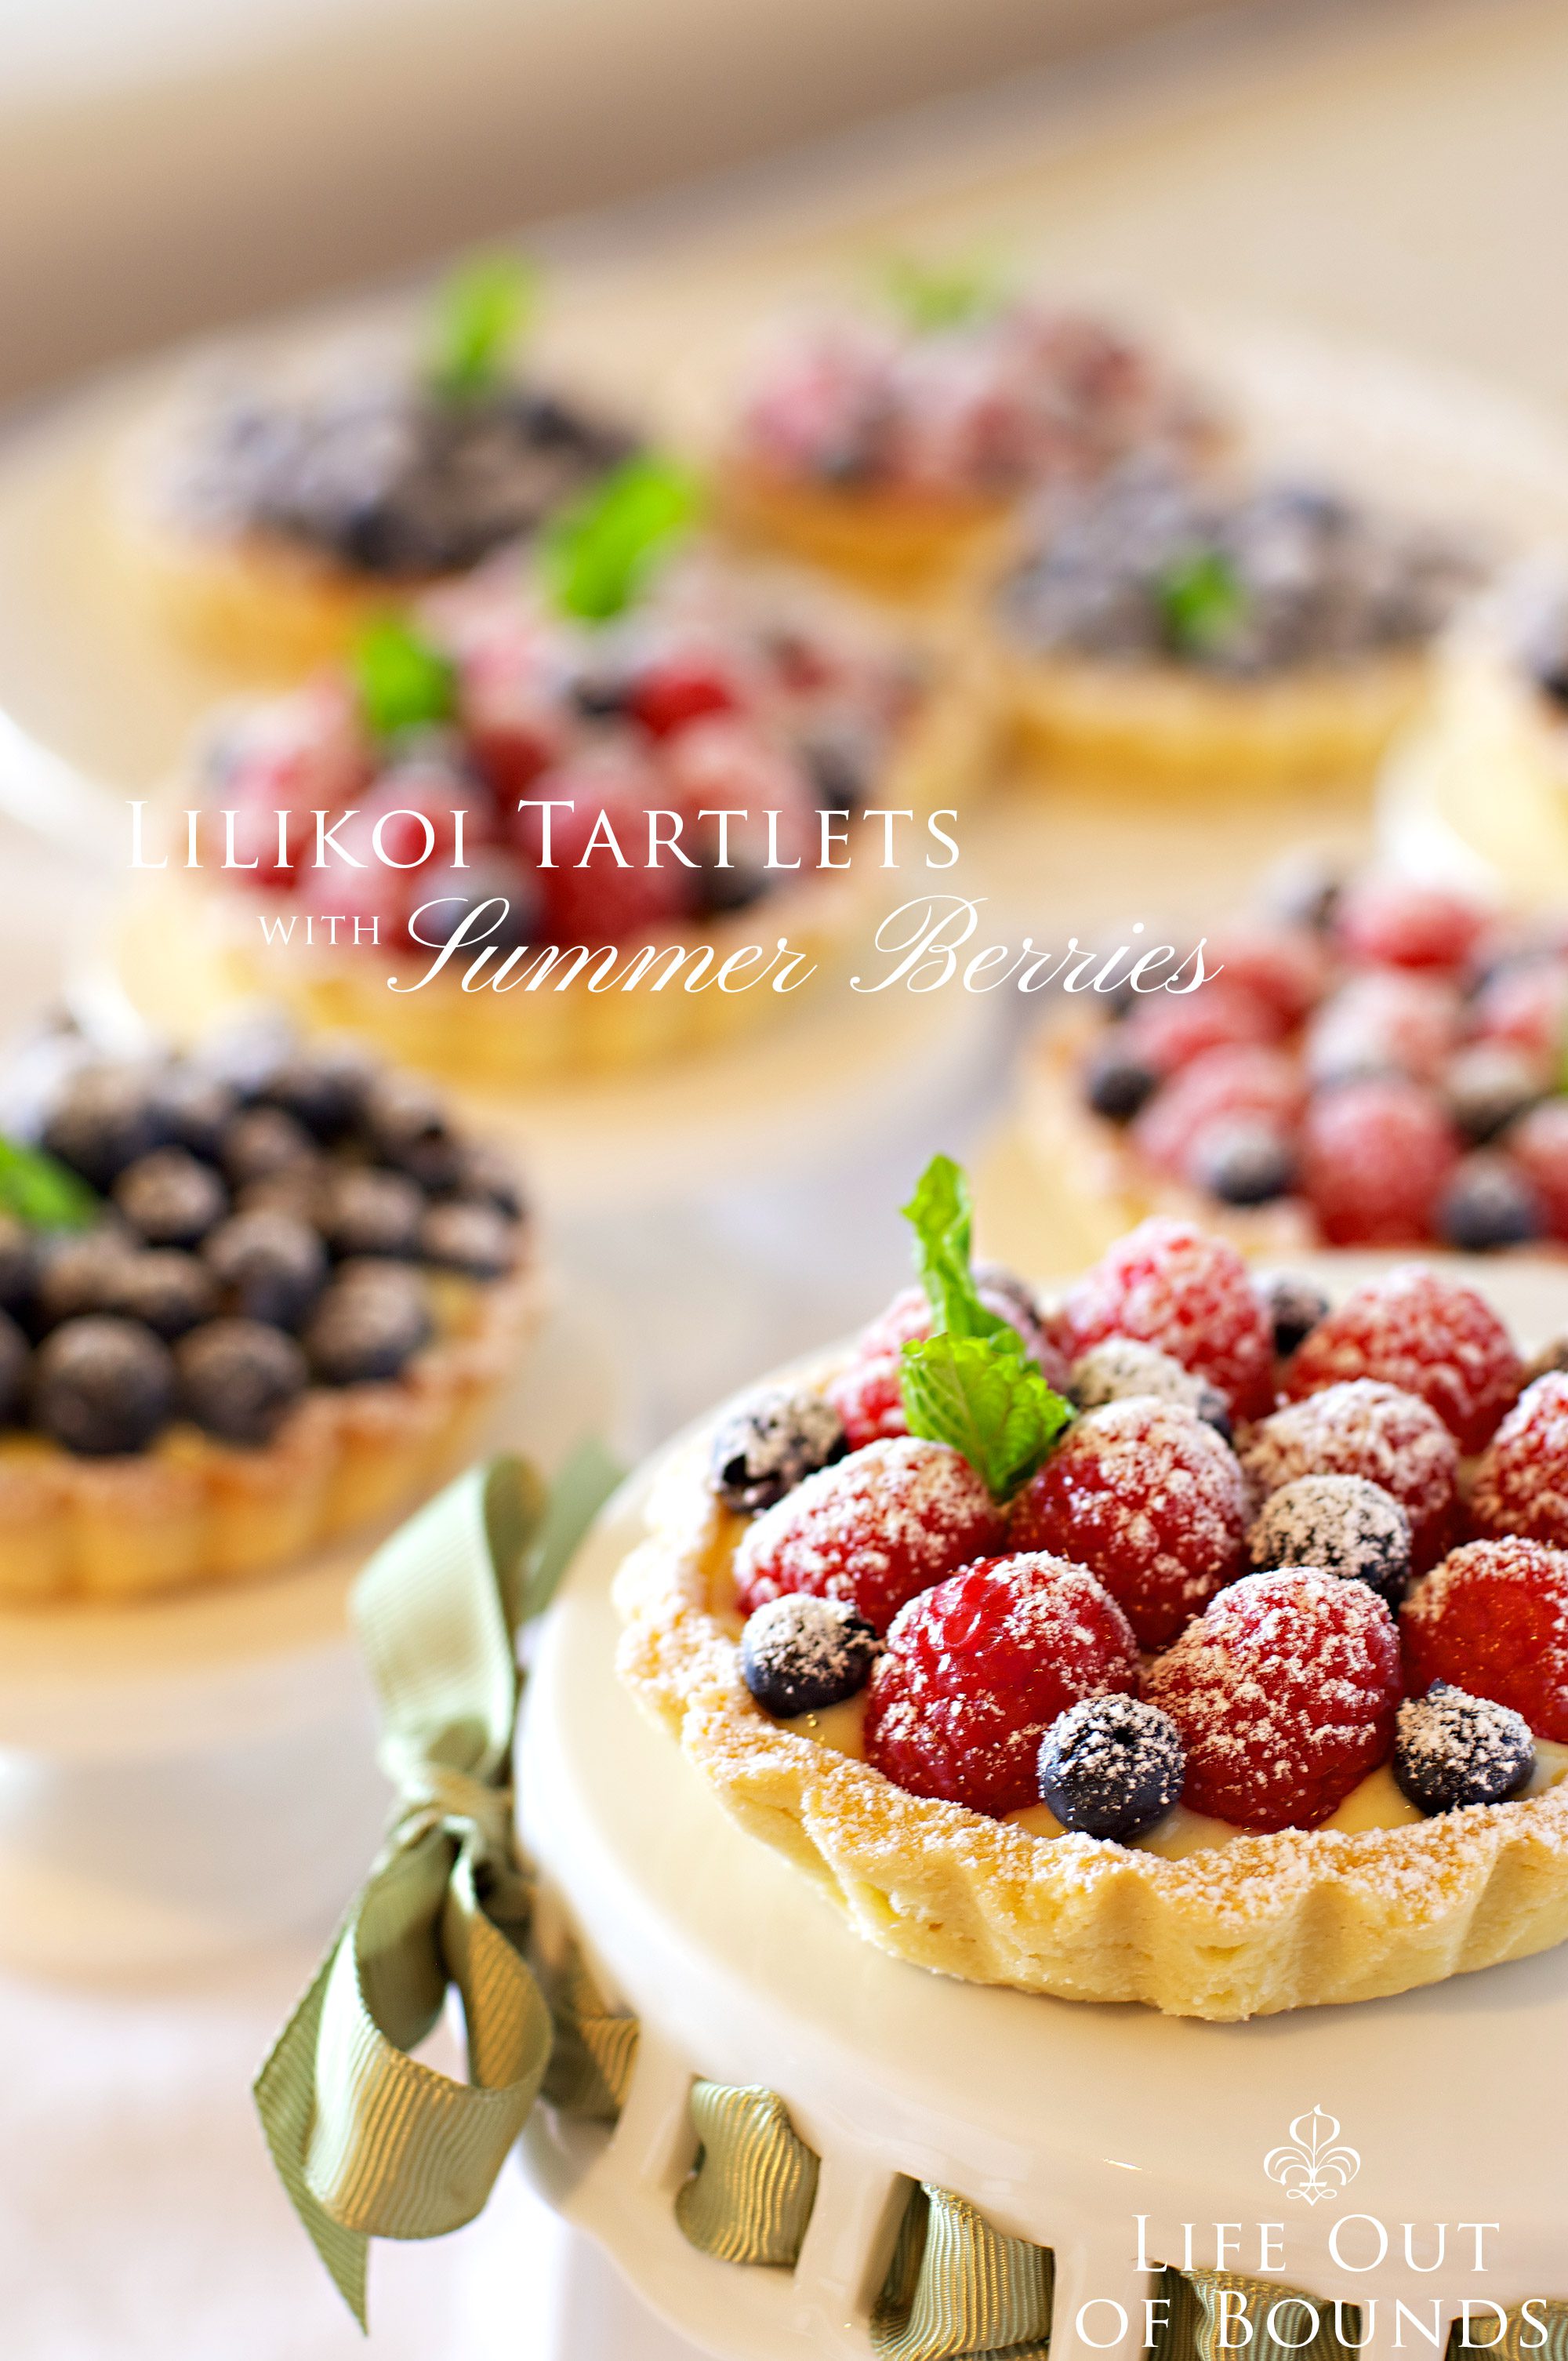
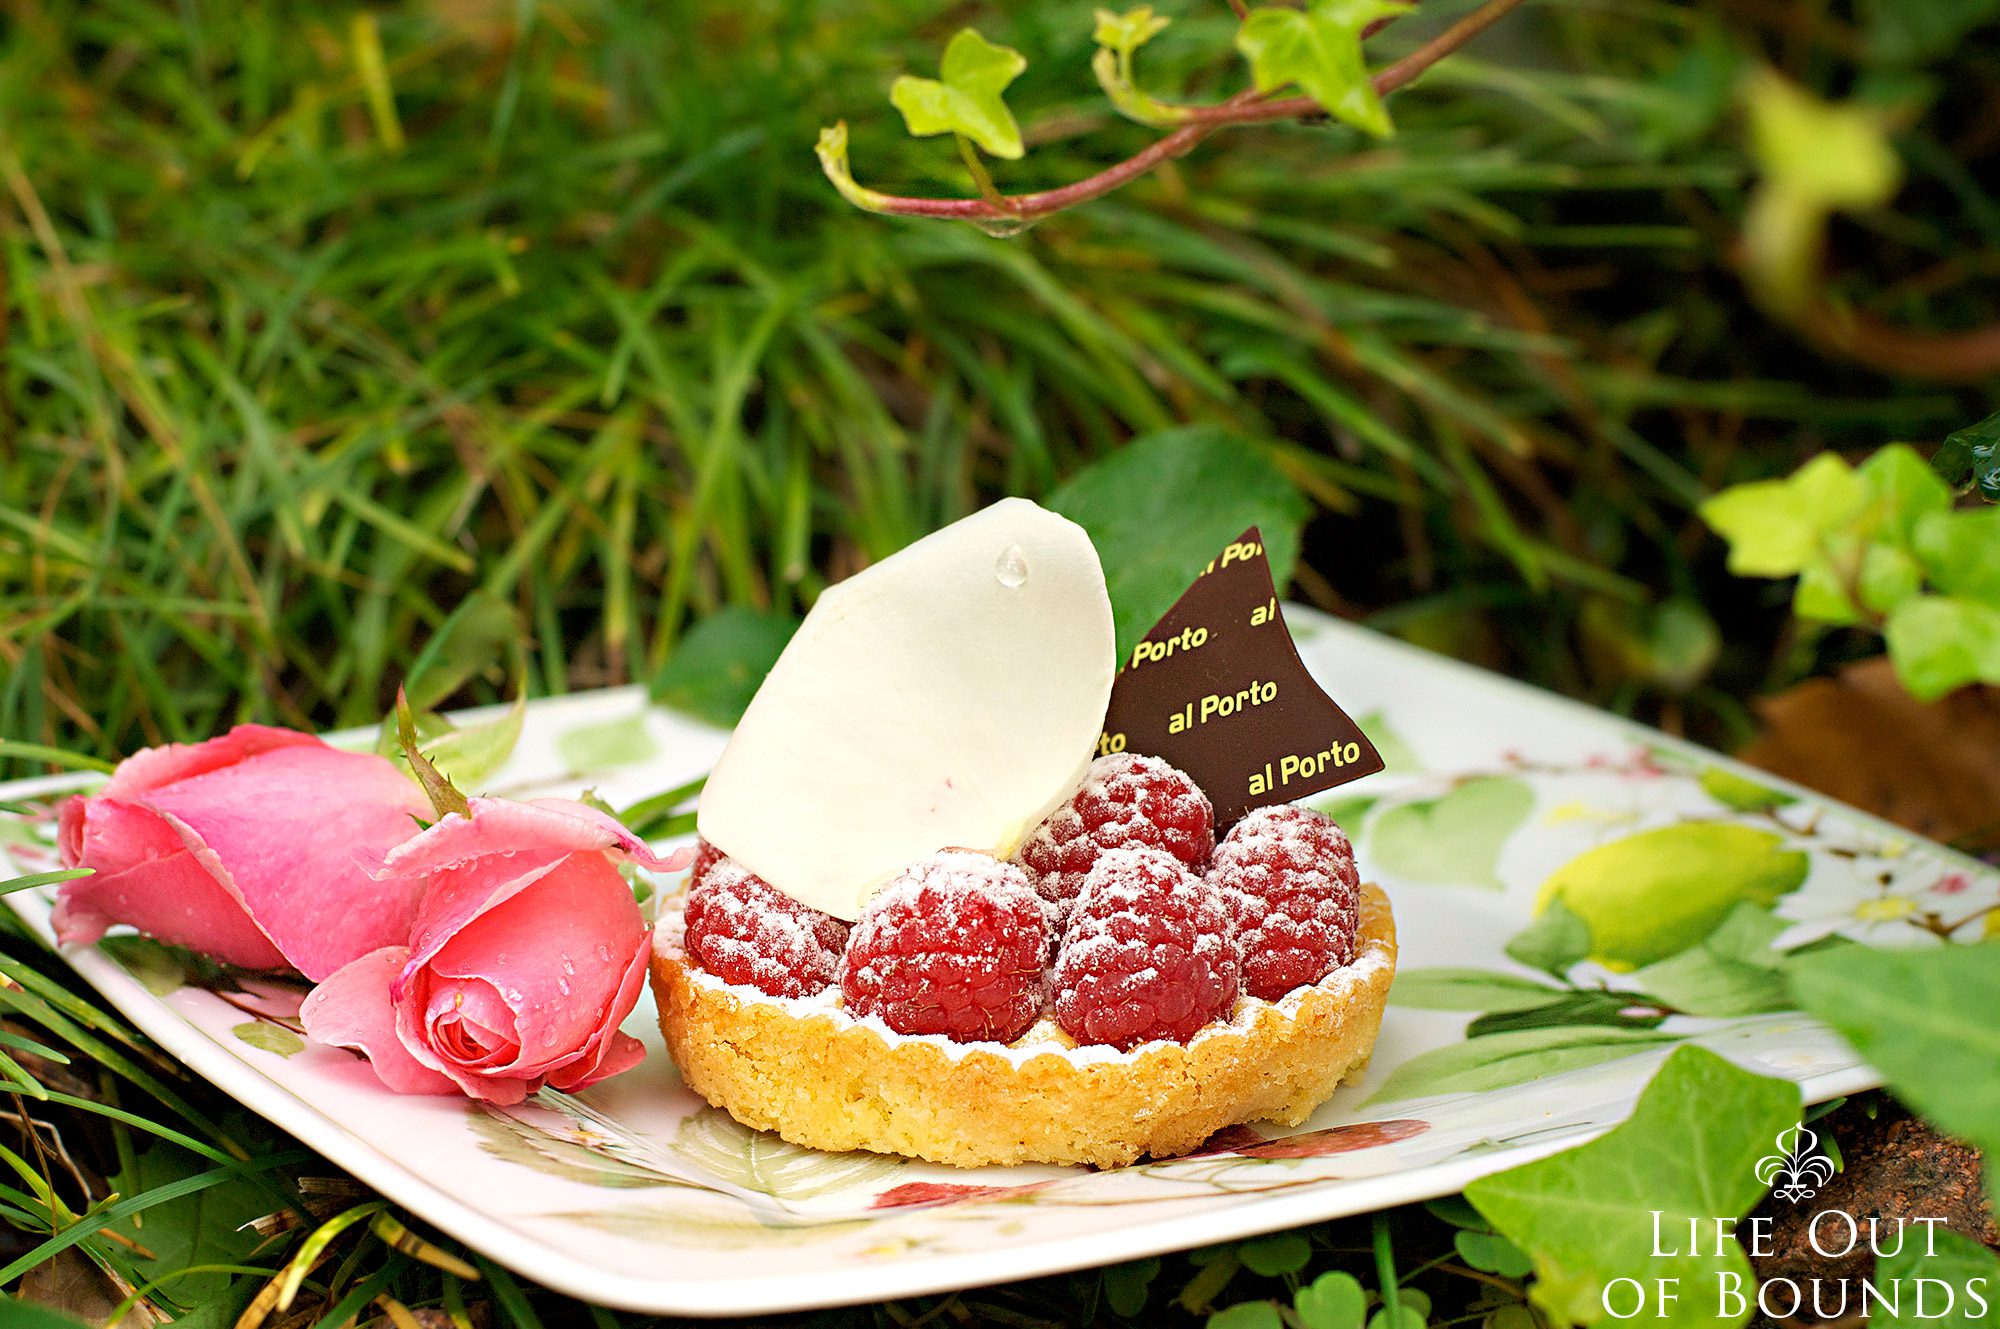
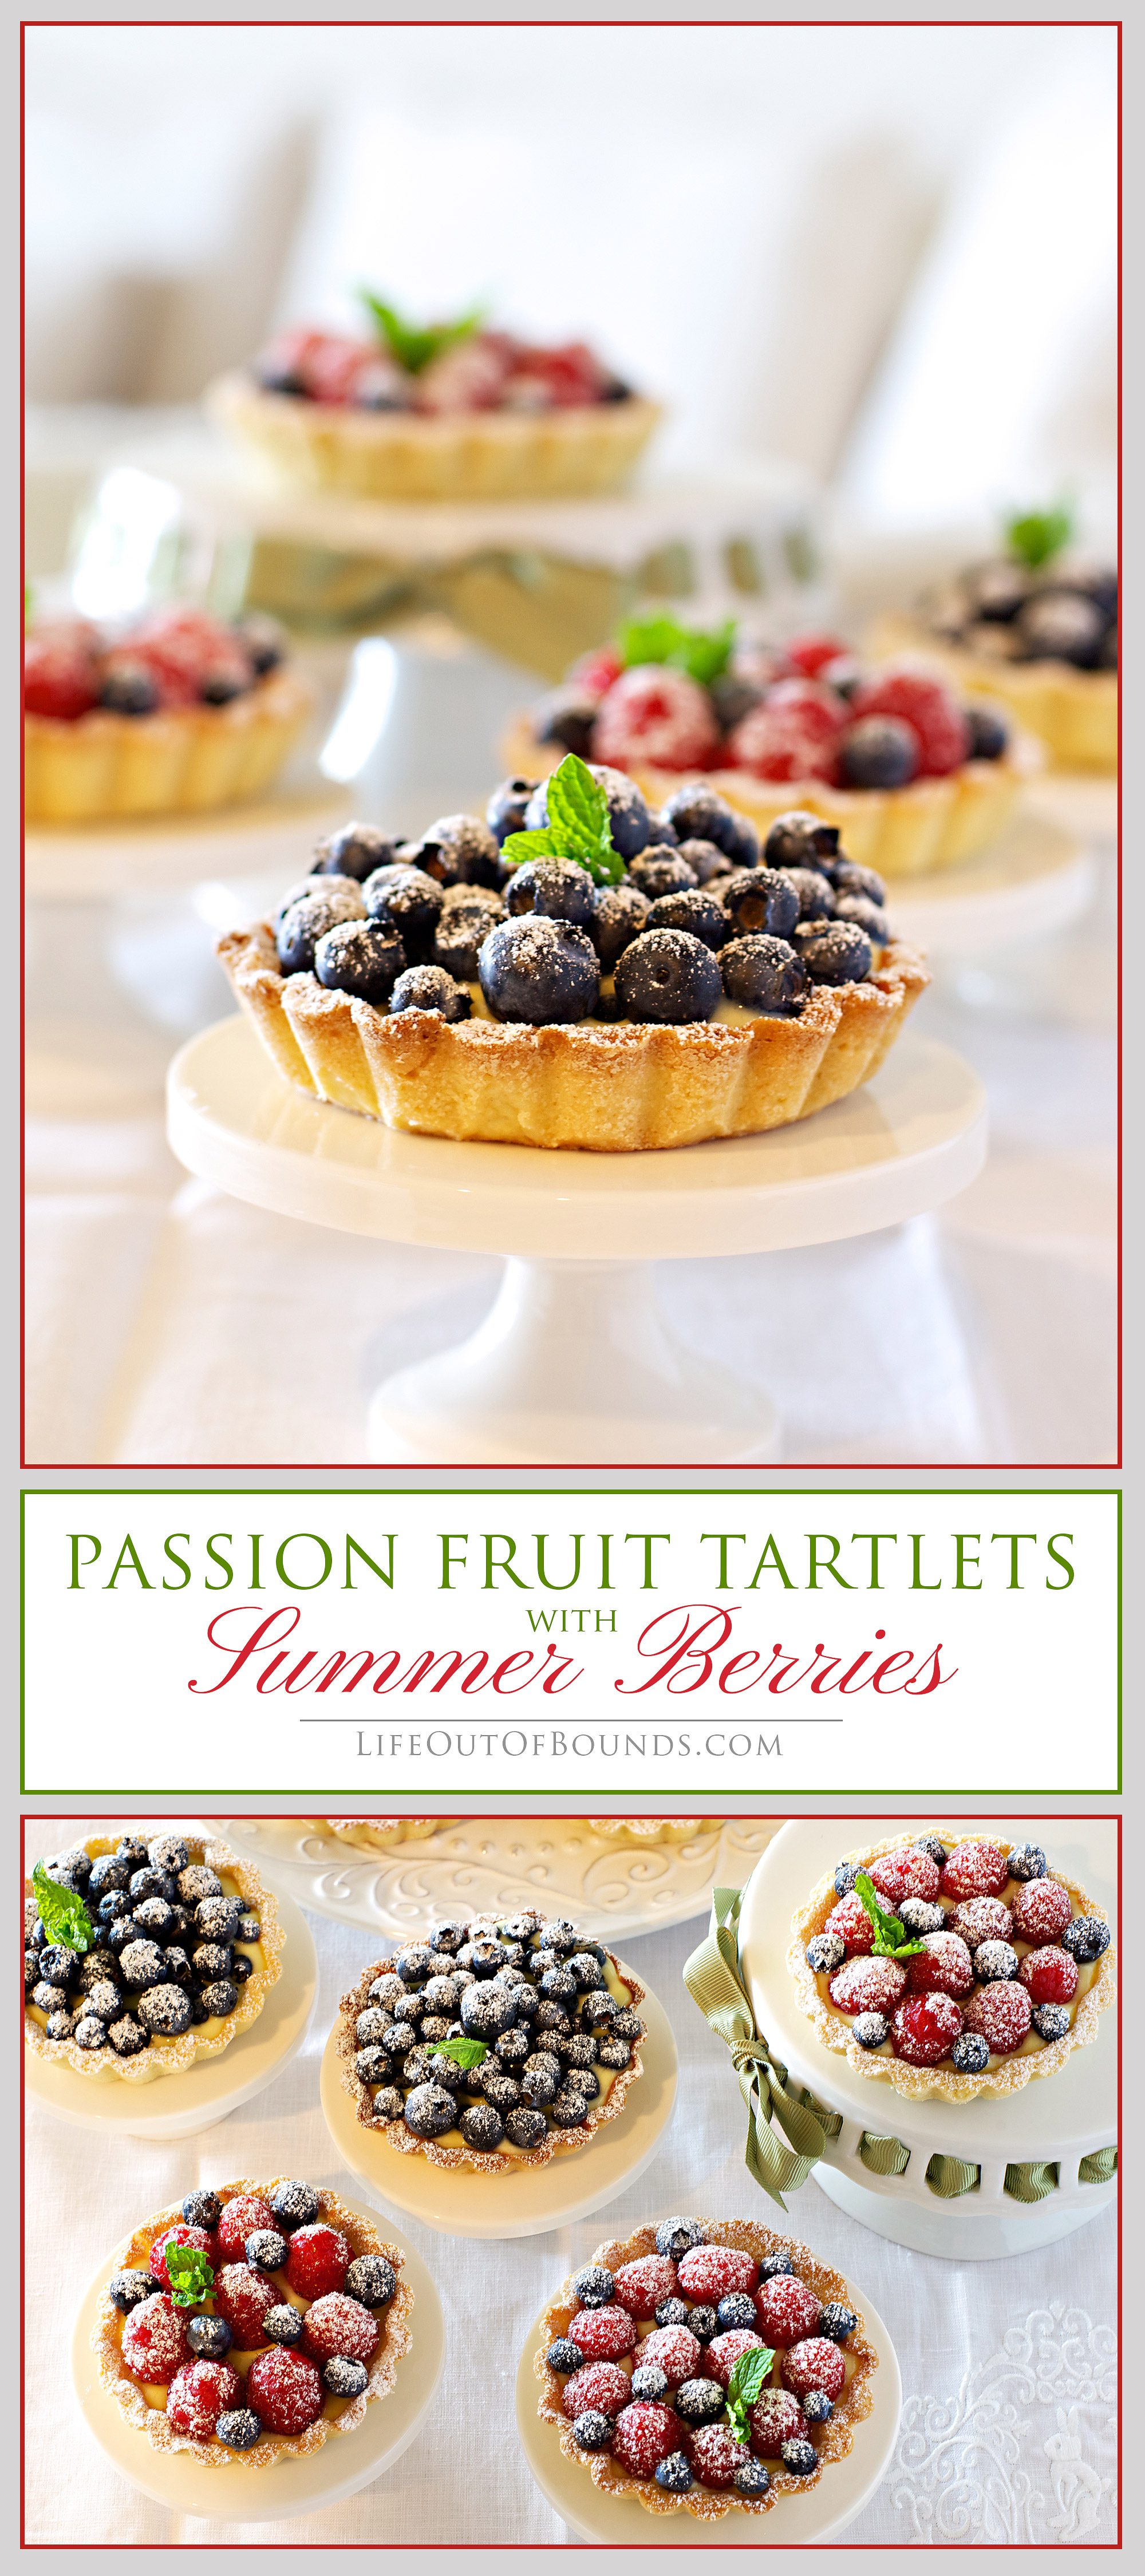
The image above is of one such desserts. I thought the after-the-storm mood and light of the garden were an interesting setting for the photos. It is a Tartelette topped with Passion Fruit Custard and fresh Raspberries, then decorated with a rose petal and a dark chocolate thin stating the origin: Grand Café Al Porto – Restaurant and Confiserie in Lugano, Switzerland. You can now view a full feature post about it at this page on the blog.
If you are ever there, this is a place not to be missed. While you wait for me to go back and take the photos necessary to do a full write-up, you can click on the link above and check out their visual website. And if you know how to teleport yourself there, please let me know.
.

.
Fast forward a few months, back in Honolulu, I decided to post one of the images of the gorgeous tartelette on Facebook and on my Instagram account (@lifeoutofbounds). It immediately received lots of likes, collected me some new followers and one of the comments was from an avid baker on the Big Island asking about the recipe. And here we are!
See, I told you the story had a point.
I made this dessert for a 4th of July celebration. It was one of three, and I will be sharing the other two recipes soon as well.
.

.
LILIKOI TARTLETS WITH FRESH SUMMER BERRIES
yields 22-23 tartlets
FOR THE SHORT CRUST PASTRY SHELLS
– 500 gr (1 lb. + 1.7 oz, or 3 & 1/2 cups) flour + extra for the work surface and tartlet molds
– 2 eggs +2 egg yolks
– 200 gr. (7.2 oz., or 1 cup) sugar
– 250 gr. (9 oz., or 2 sticks + 2 Tablespoons) butter + extra for buttering the tartlet molds
– 1 teaspoon pure vanilla extract
– finely grated peel of 2 lemons (or 1 lemon and 1 orange)
– pinch of salt
– 1/4 teaspoon baking powder
– a little cold water if necessary
FOR THE LILIKOI (PASSION FRUIT) CUSTARD
– 500 ml. (15.9 fl. oz.) milk
– 100 ml. (3.4 fl. oz.) lilikoi (passion fruit) juice – you obtain this by slicing the fruits in half, spooning out the juicy center into a fine sieve set over a bowl, and pushing through as much juice as possible with a spoon, while keeping the seeds on this side (image above)
– 1 egg + 5 yolks
– 130 gr. (4.6 oz.) sugar
– 40 gr. cornstarch
FOR THE FRUIT TOPPINGS
– fresh raspberries, blueberries, blackberries or even strawberries (these you would most likely have to cut, though)
– fresh mint sprigs
– powder sugar
Unless you are lucky enough to grow them in your garden, please do your best to purchase organic berries as they are best not washed in water, especially raspberries, as they are very delicate.
You will also need:
– about 20-25 metal tartlet molds – the ones I used are the standard 3″ base diameter. You can purchase these in any cooking/baking supply store, or from various on-line suppliers like Williams-Sonoma and the ever amazing Amazon.
– wire cooling racks
– 2 cookie baking sheets to place the tartlets on for baking
– parchment paper cut into squares a little larger than the tartlet molds
– baking weights or small dried beans
MAKING THE SHORT CRUST PASTRY
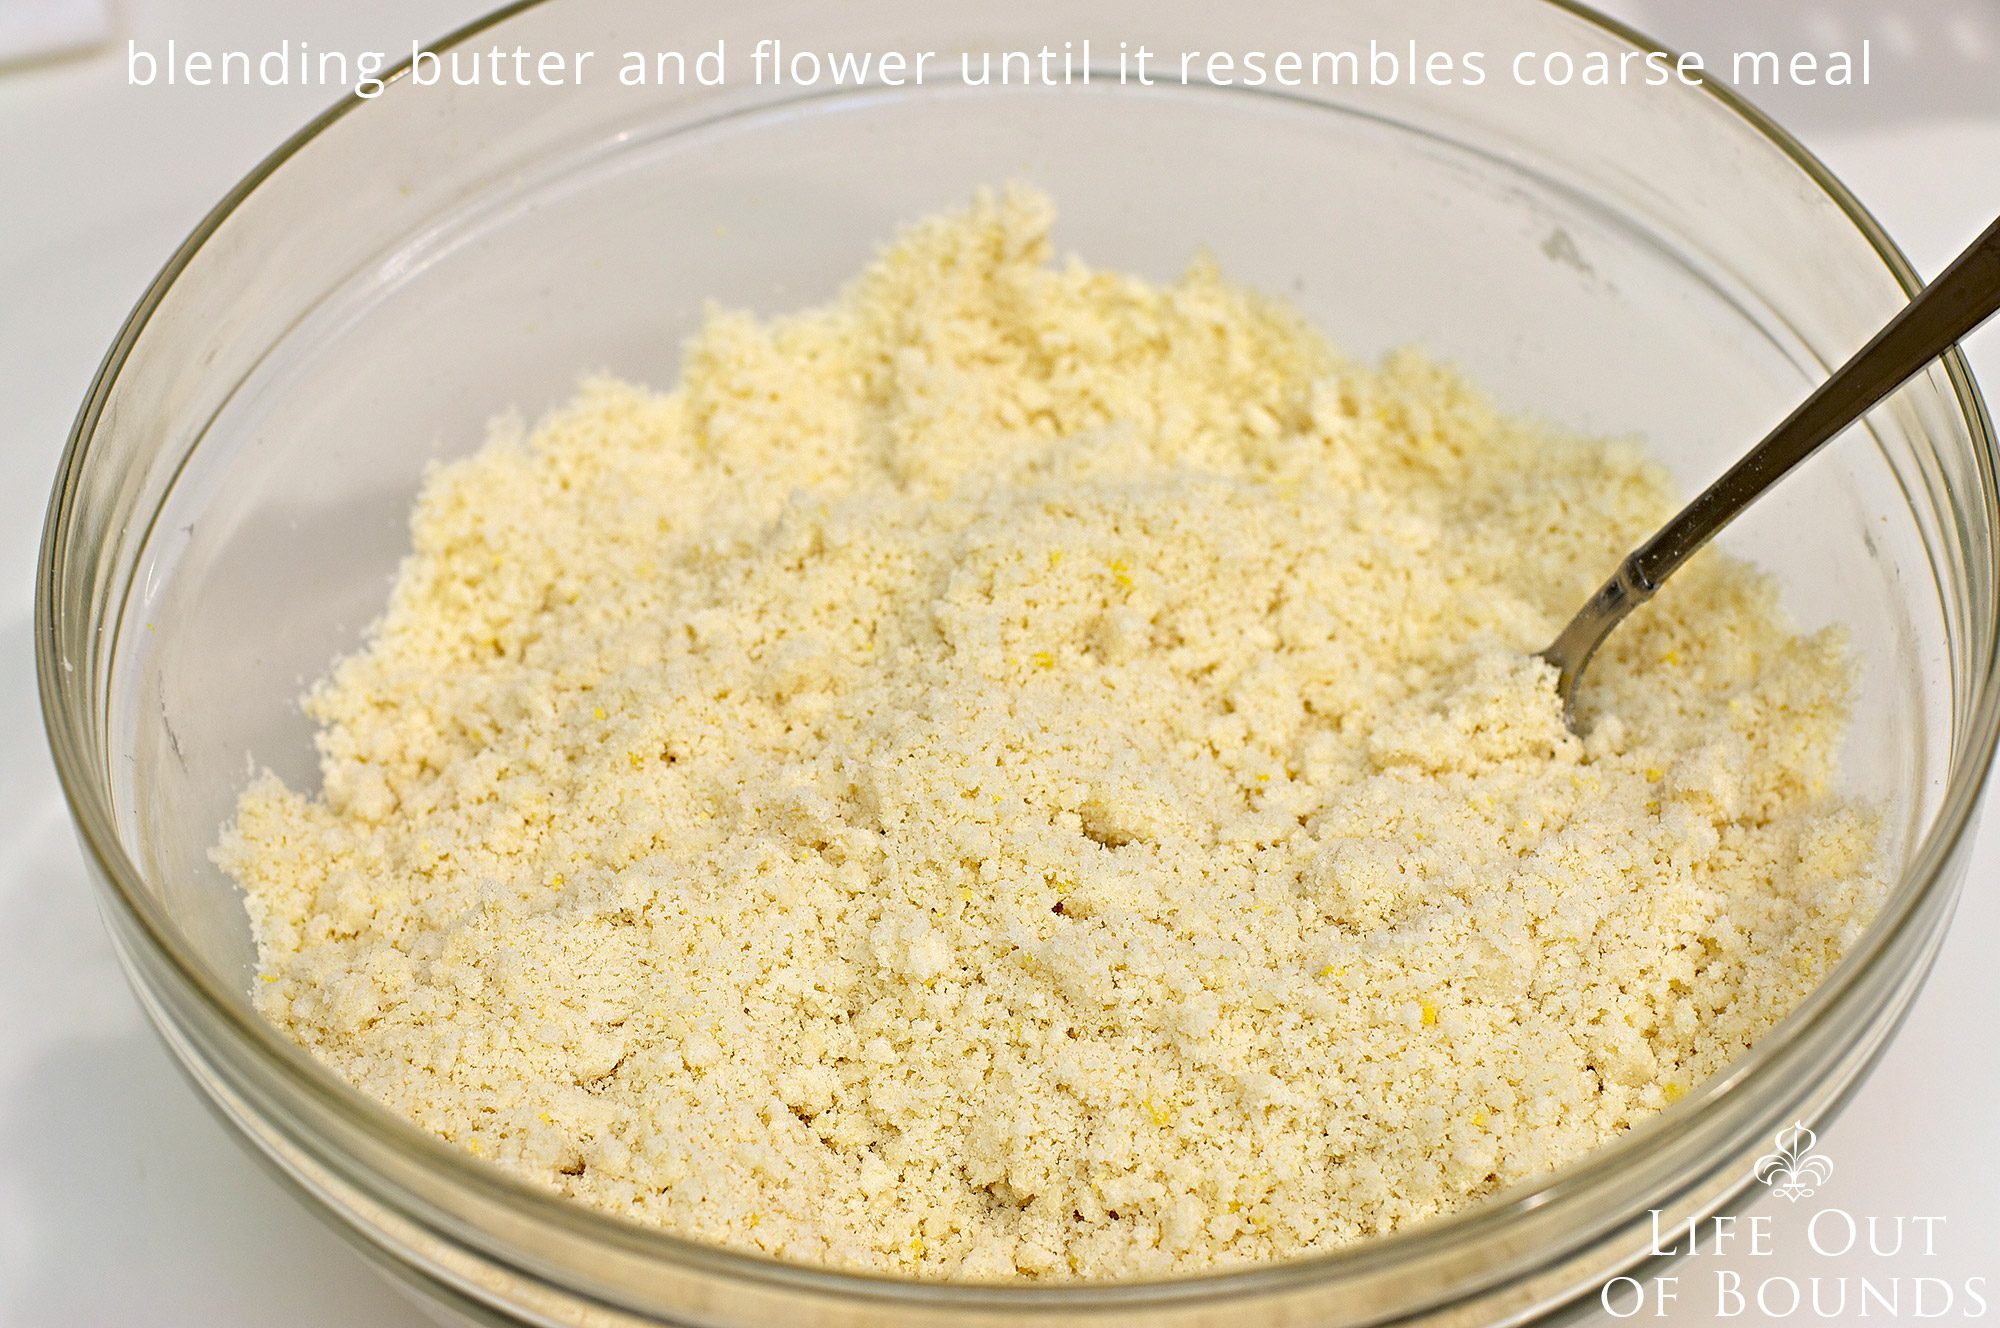
1. In a large prepping bowl mix the flour, sugar, baking powder, salt and grated citrus peel. Add the cold butter in small pieces and work with a fork (which is cooler than your hands) until the mixture resembles coarse crumbs. If you have a food processor, you can do that in there with a few simple power pulses.
.
.
2. In a smaller bowl, beat the eggs and egg yolks lightly with the vanilla extract, add them to the flour/butter mixture and start stirring. Flip the whole thing onto a lightly floured work surface and continue blending with your hands, kneading the pastry until smooth and holding nicely together. Do not over-work it or it will become hard and loose the flaky tenderness after it is baked.
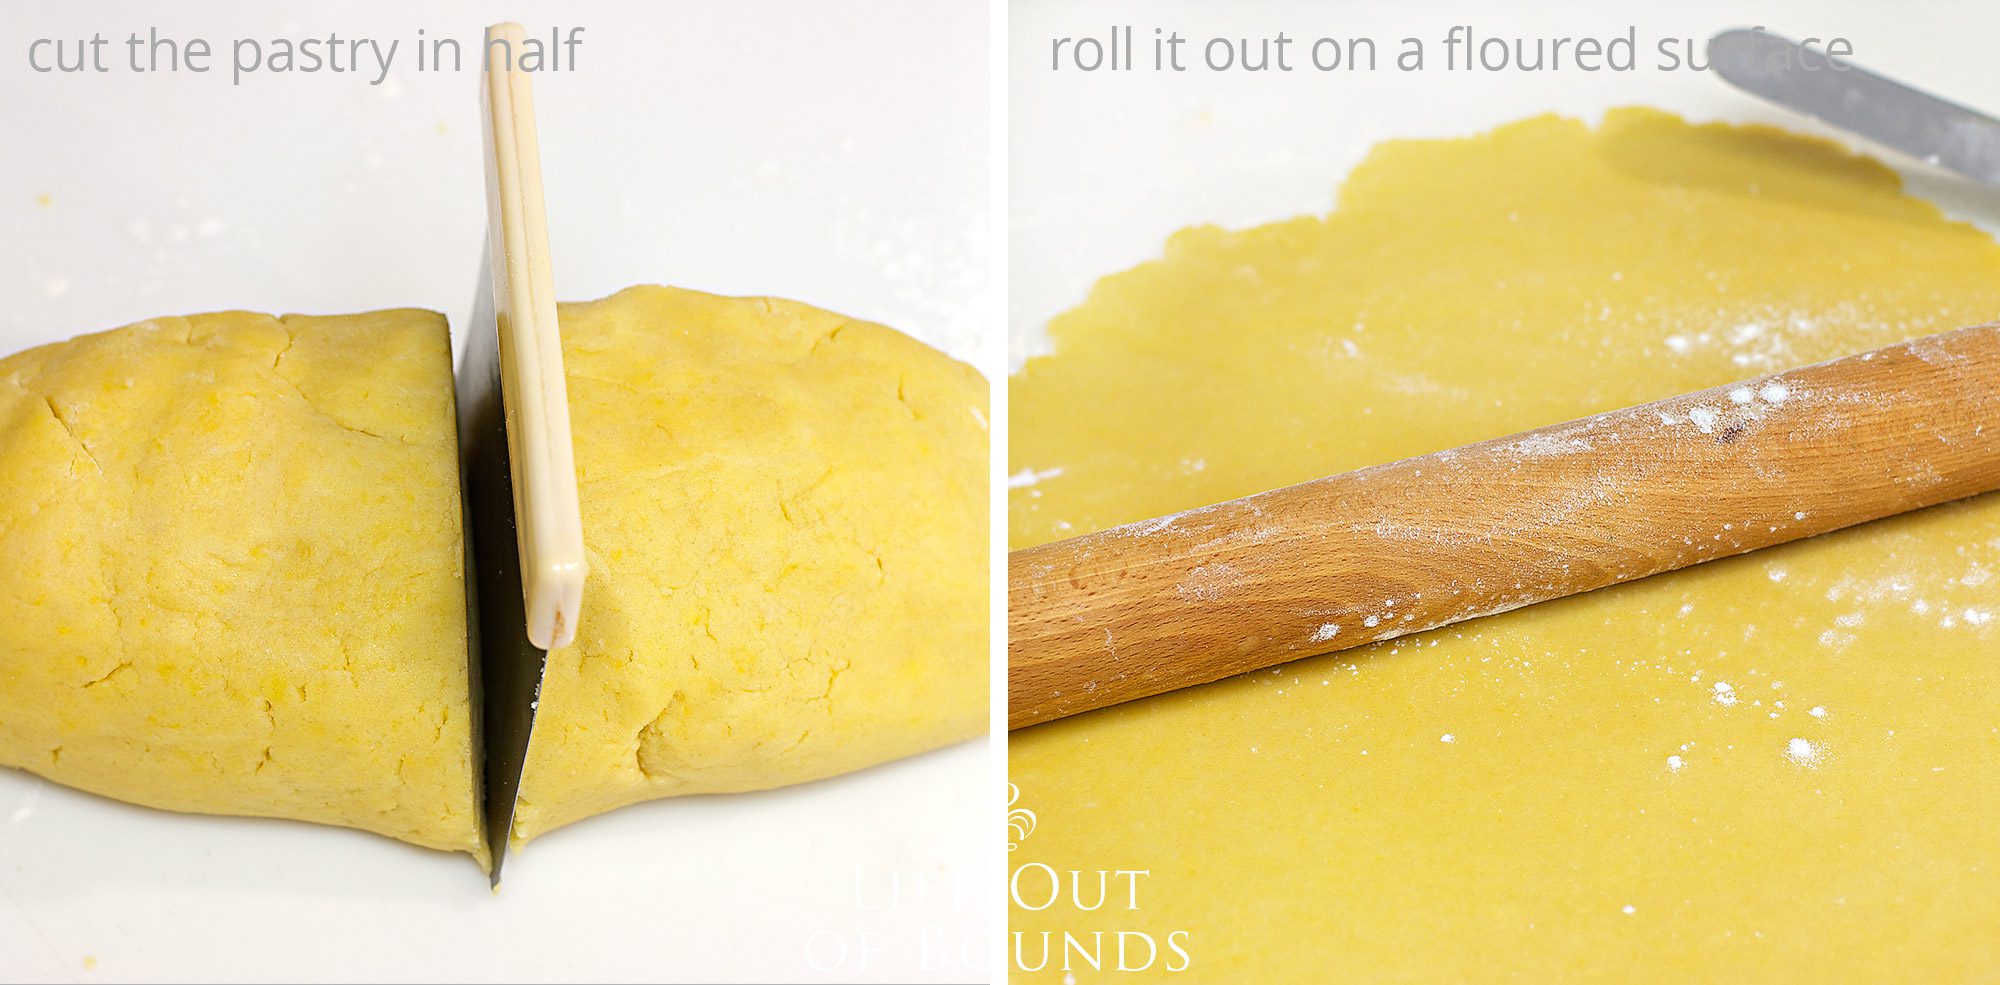
The result is a rather large ball of pastry, so it is best to cut it in half for ease of use. Pat those halves down to flat rounds, abut 1 inch thick, as it will be easer to roll them out, then wrap them in cling wrap and place them in the refrigerator to rest for about 45-60′. They can be refrigerated for longer, of course, up to 2-3 days, but then you will have to leave them out on the counter for about 1 hour to make them soft enough to roll out. If you are planning ahead, the pastry can also be frozen for up to three months. In that case, besides the cling wrap, I would protect it with an extra layer of strong foil. Defrost the pastry overnight in the refrigerator.
.
3. Remove the pastry from the refrigerator. Using a pastry brush, butter each single tartlet mold and then coat it with flour, tapping out the excess. Preheat the oven to 360°F/180°C.
4. Using a floured wooden rolling pin, roll the pastry out on a floured surface to a thickness of about 2mm (ca 1/8 inch), Place one of the tartlet molds on top and cut out circles of pastry around that are a little larger than the mold itself. Helping yourself with a metal spatula, loosen and lift each cut out circle and press it gently into the molds to fit perfectly. Cut off the excess from the edges with a paring knife. Gently poke holes with a fork here and there on the bottom. Place the unbaked tartlet shells in the refrigerator for 15′. Collect all the excess pastry from the cut outs, press together and set aside, covered, to roll out again in a minute. Repeat as needed.
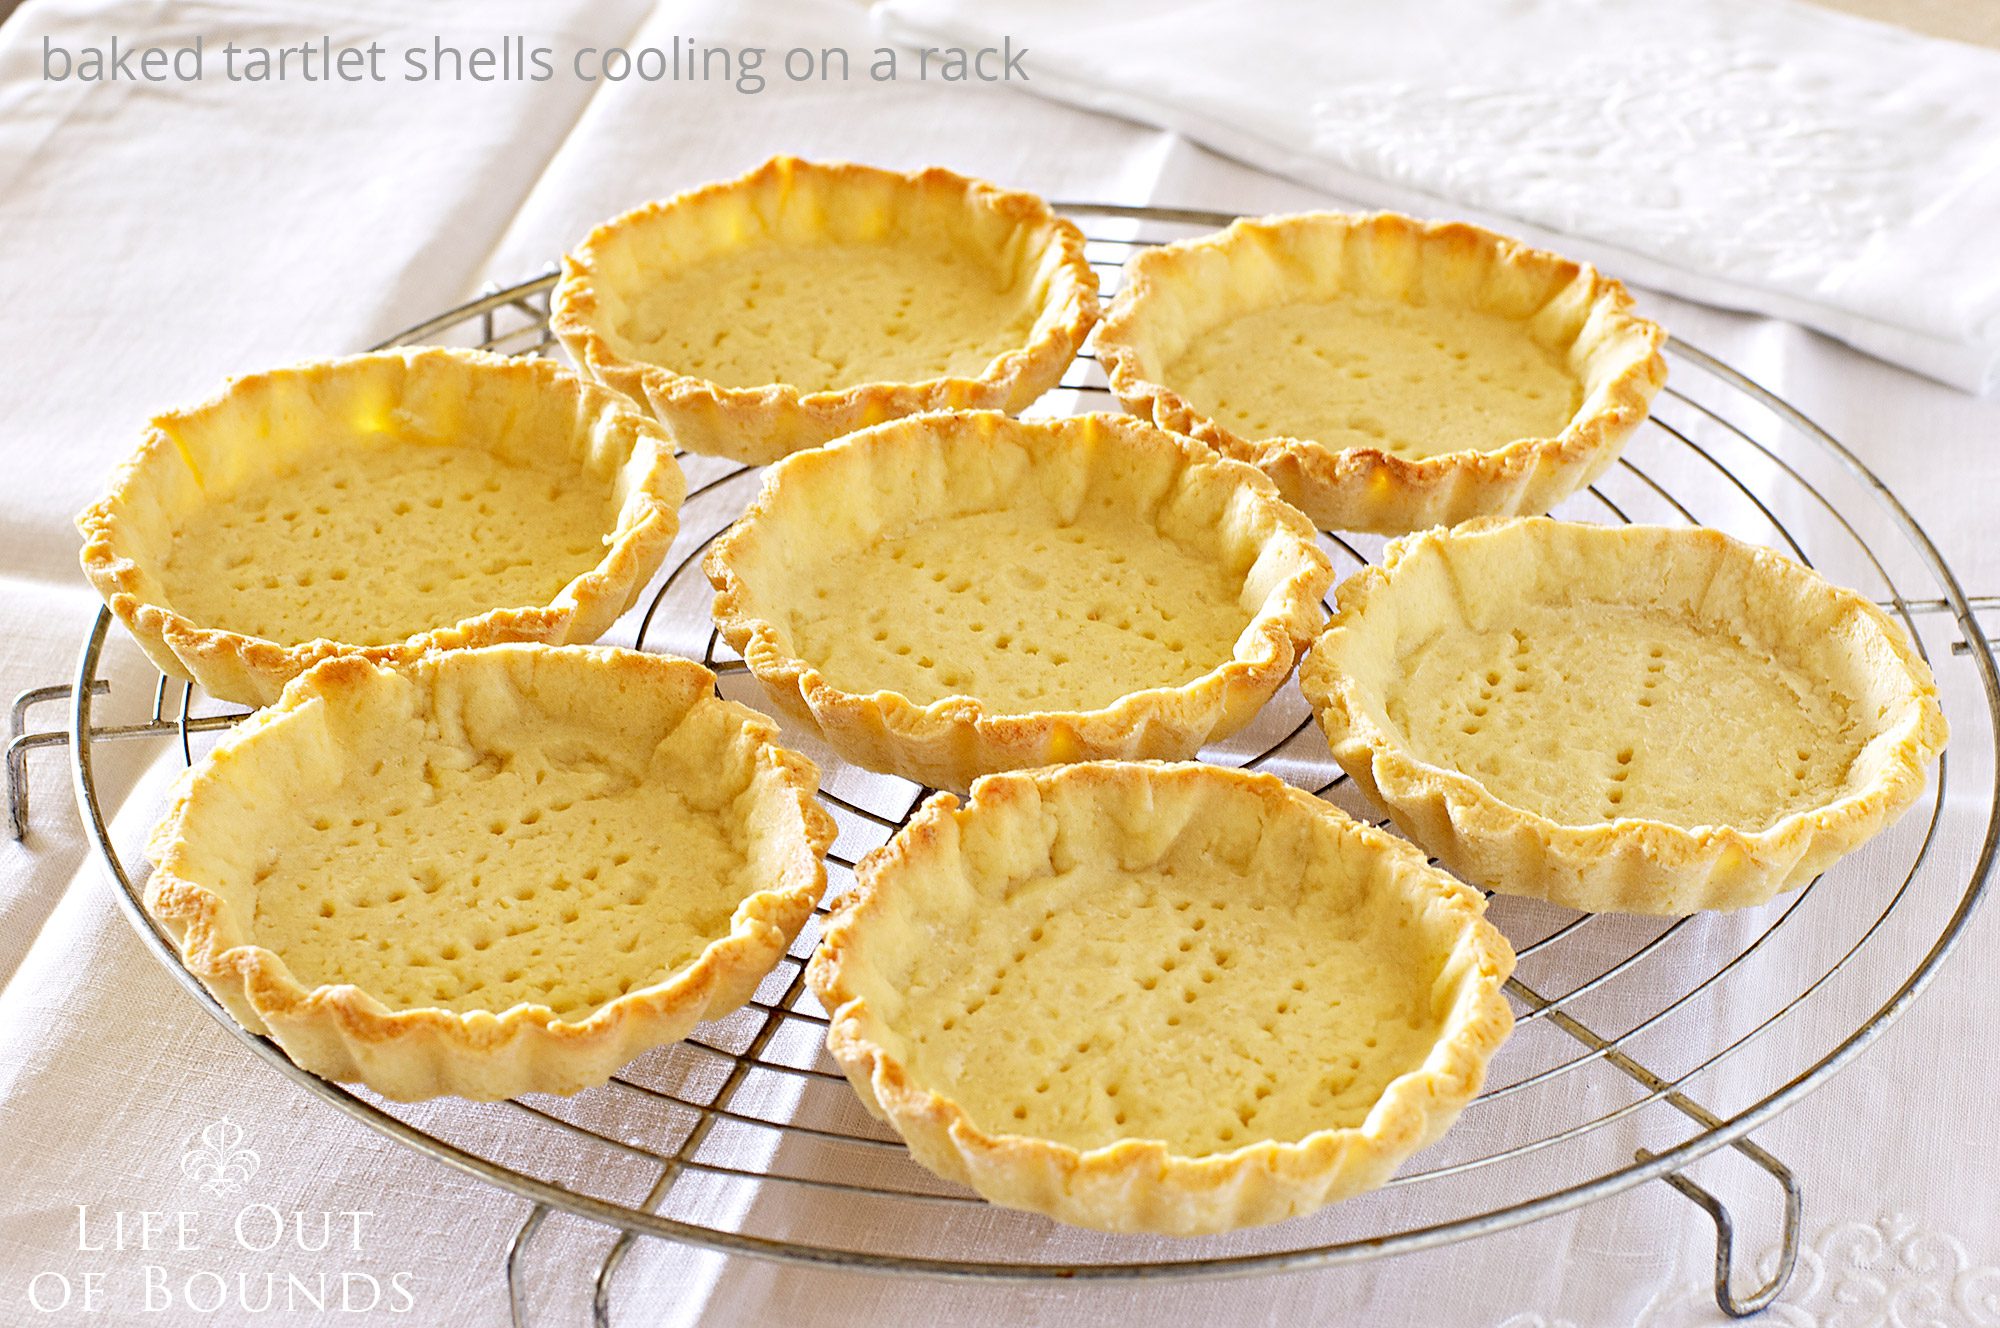
5. Remove the unbaked tarts from the refrigerator. Line them with the squares of parchment, and fill them with pie weights or dried beans. Place them on a cookie baking sheet and bake for about 10-15 minutes until you can see the pastry has lost its luster and starts to get a light golden color. Remove from the oven, gently remove the parchment with the weights (the parchment will be cool enough to handle, but the weights will be super hot) and place aside to re-use if needed. Place the tart shells back in the oven for another 5 minutes until golden and the bottom has also set and lost the luster.
Cool on a wire rack for about 10′, then invert the baked shells onto the rack and let cool completely. Repeat as needed.
This process is called par baking, when you bake just the pastry shell to then be filled with a cold filling afterwards. I have recently found a really good blog post with good advice for par baking and you can access it here.
.
.
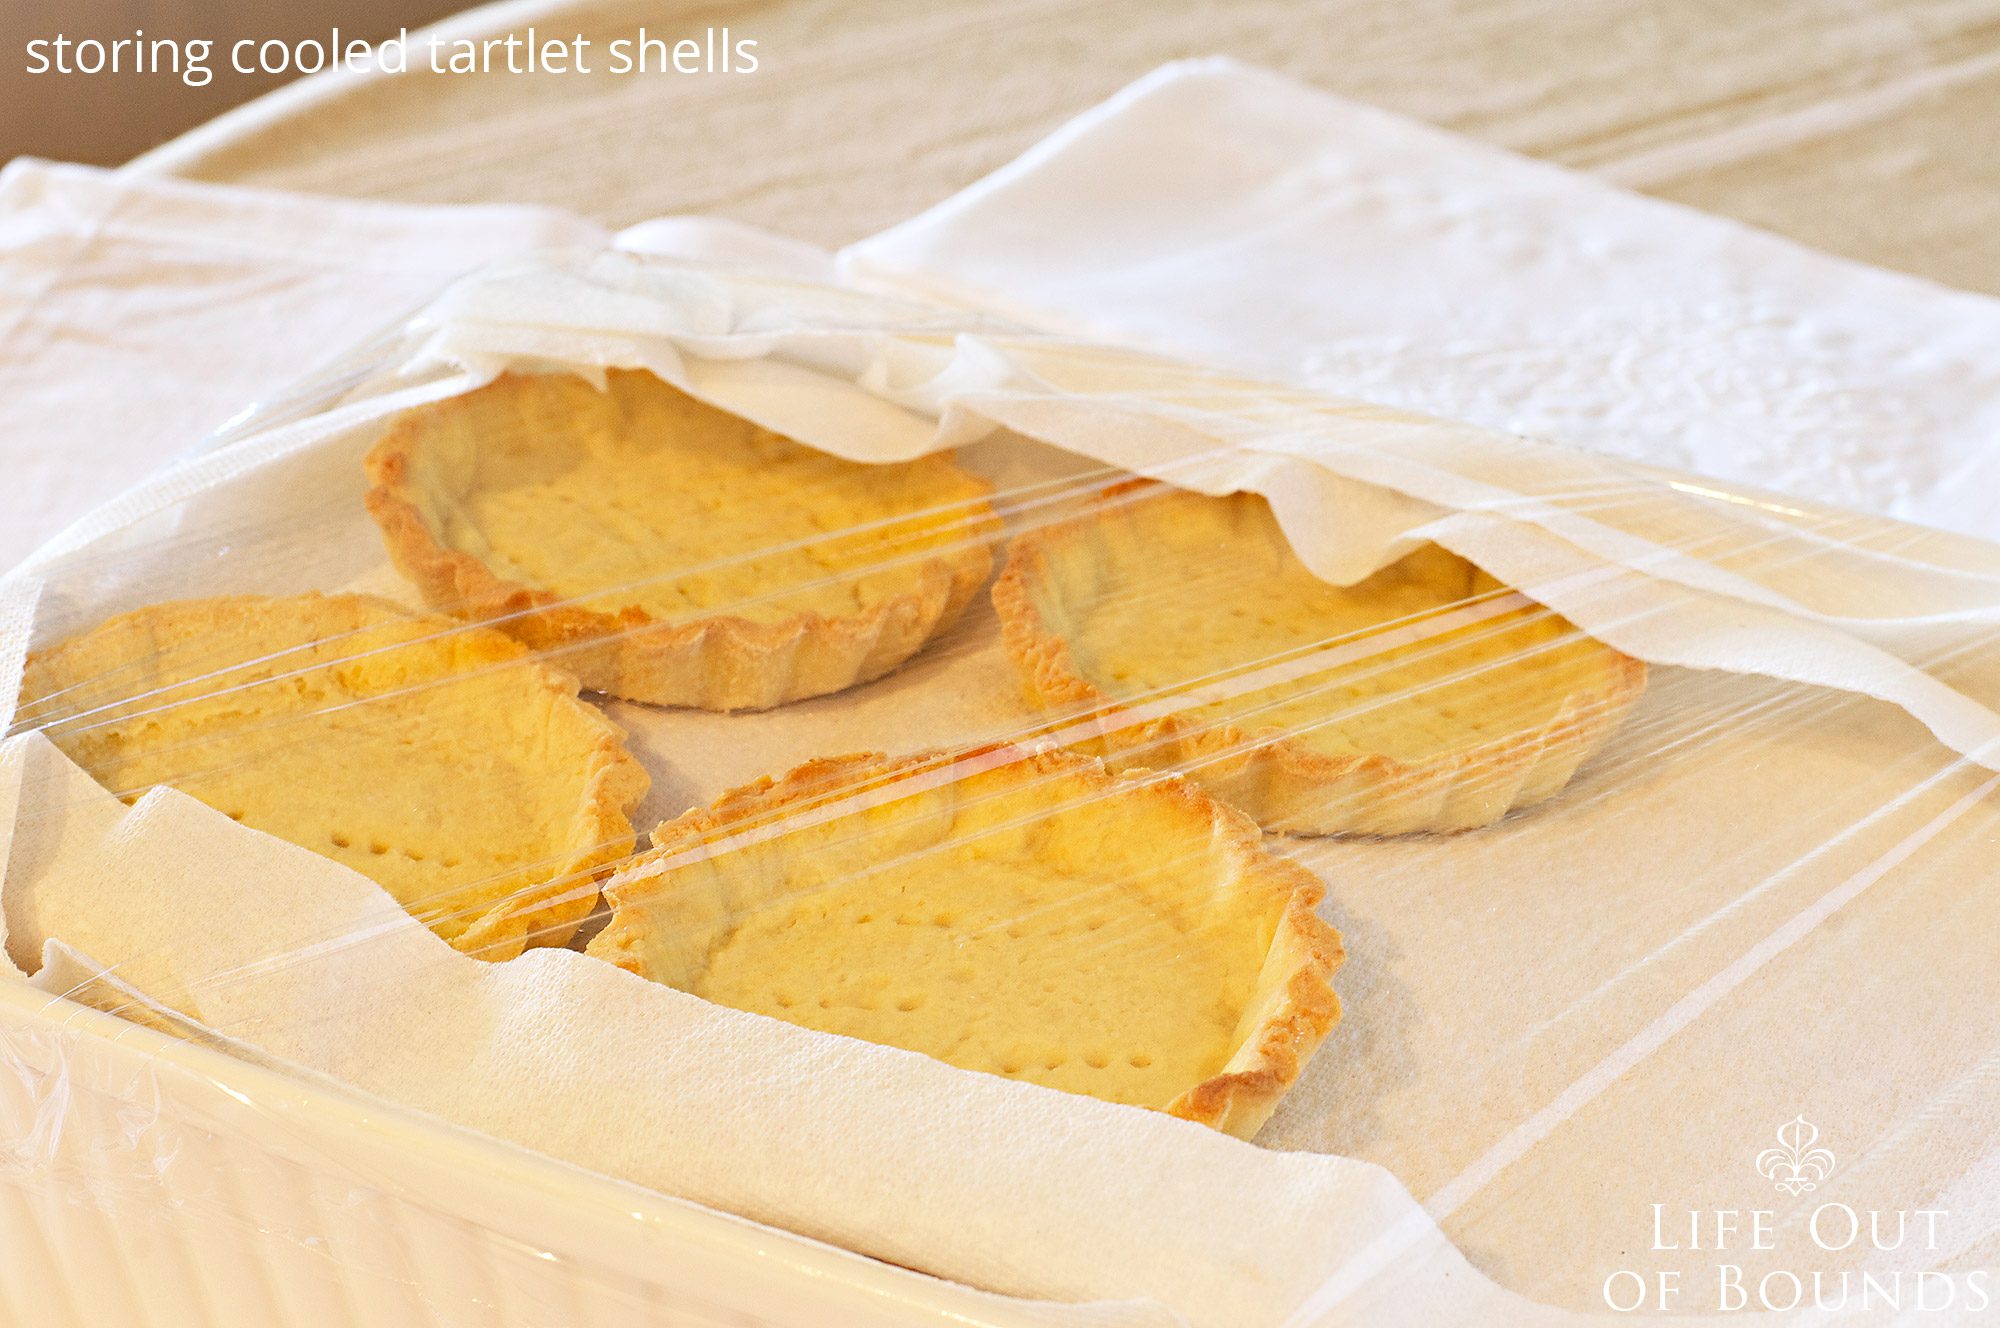
The cooked tartlet shells will keep, covered in a cool dry place, for about 4-5 days. You can store them in either a tupperware container or a deep baking dish layered among kitchen paper to protect them. You can also wrap them singularly in heavy foil and freeze them for up to 2-3 months.
.
.
MAKING THE LILIKOI CUSTARD
The process is the same as vanilla custard or crème anglaise.
1. Prepare an ice water bath in a bowl. This bowl will have to be of similar size to the one where you will pour the finished custard, so that the latter can sit on it without sinking into the water while you stir.
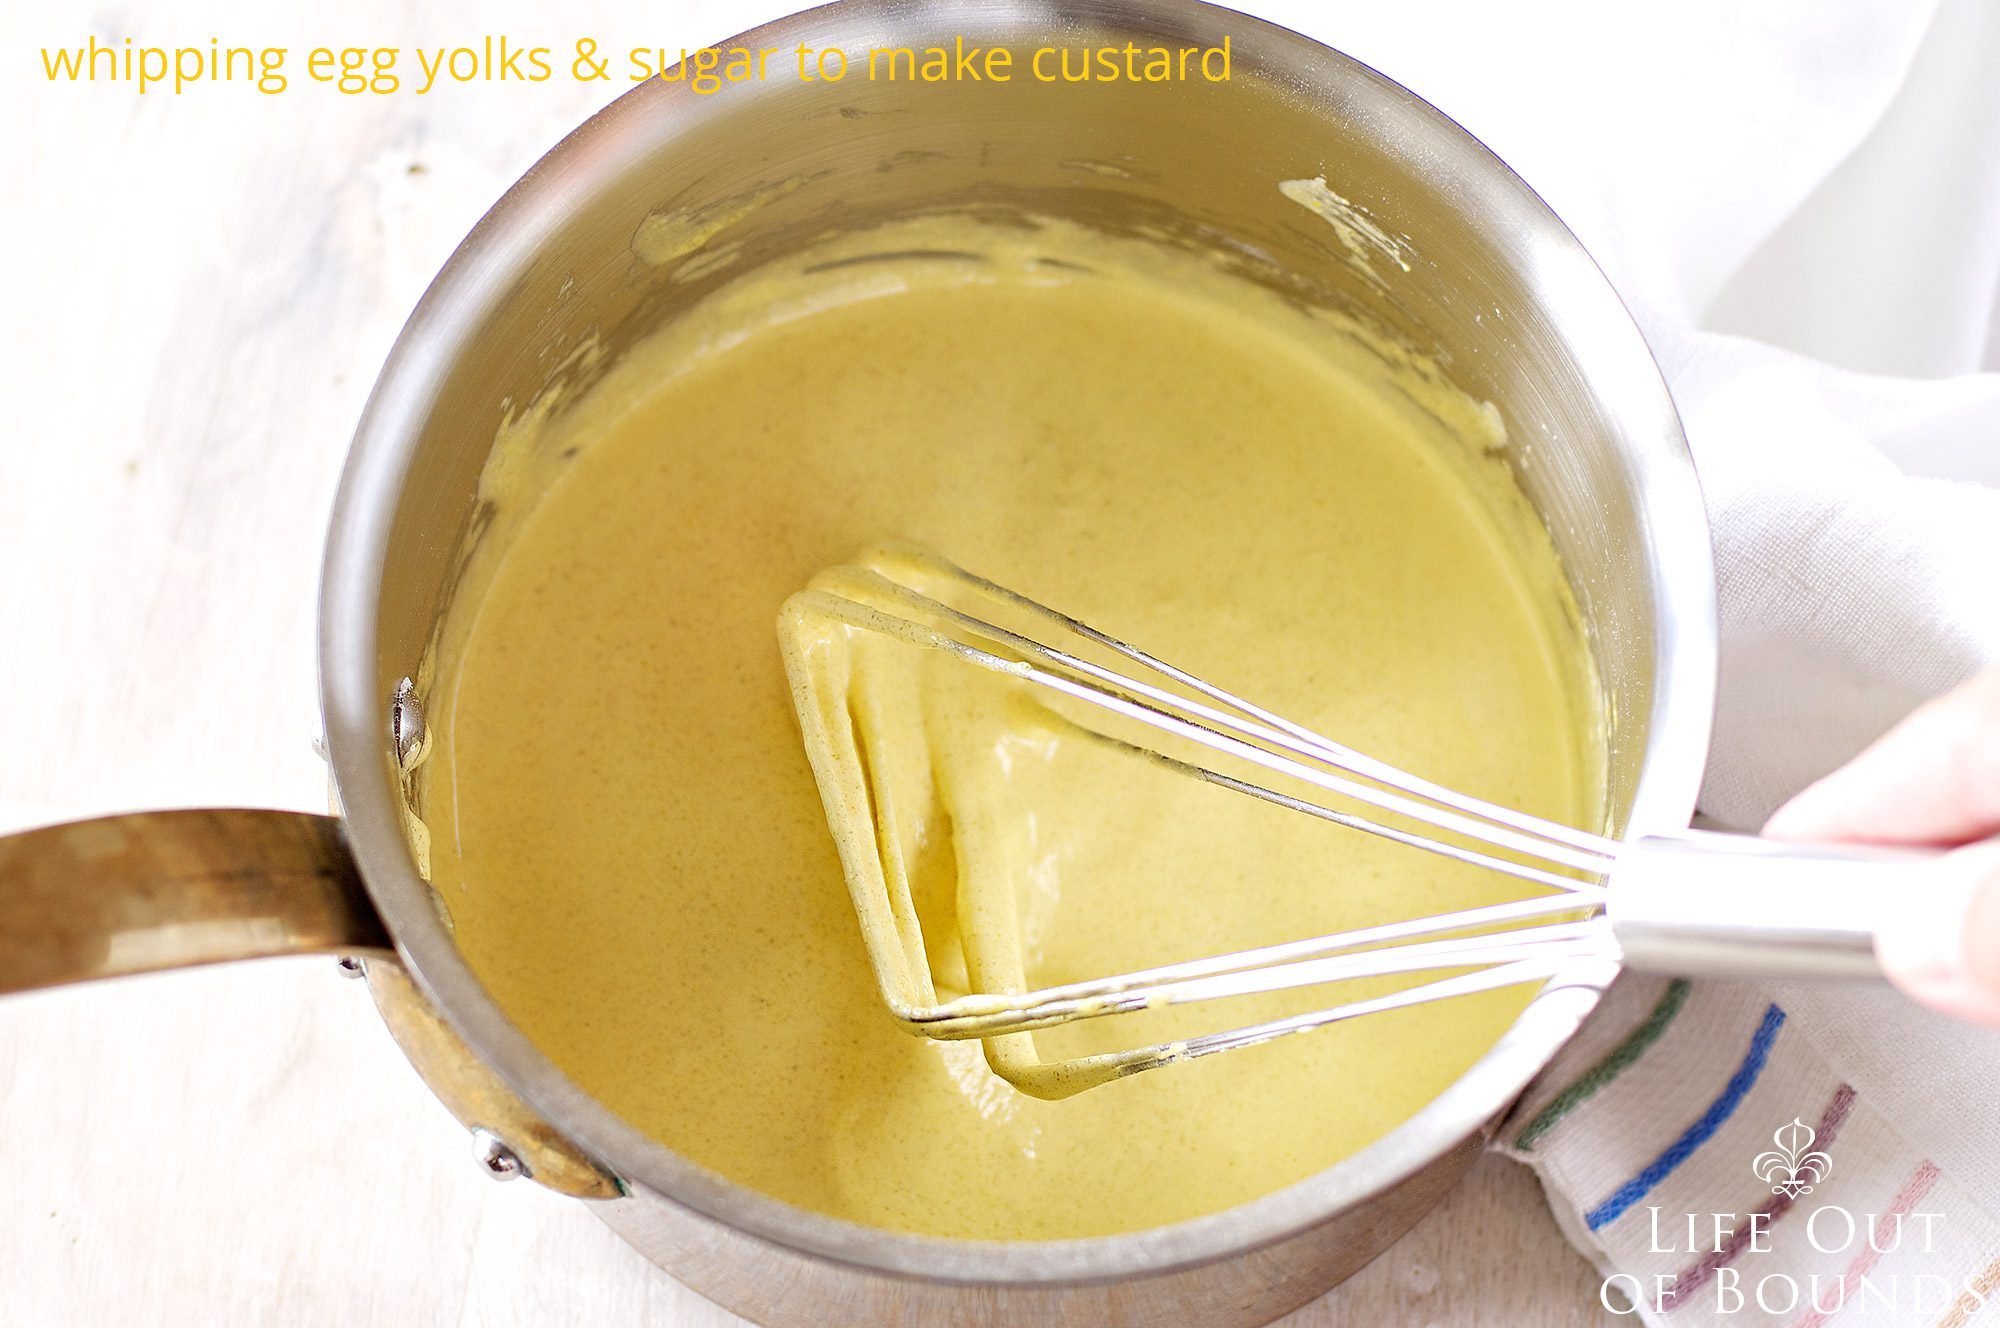
In a medium saucepan whisk the egg yolks with the sugar and flour until smooth, fluffy and pale yellow.
.
.
2. In the meantime, bring the milk and lilikoi (passion fruit) juice to a simmer in another saucepan. Remove from heat and pour about a cup of the hot milk into the egg and sugar mixture, stirring with a whisk until combined. Add the rest of the hot milk in two more stages, whisking until smooth. Place this on the stove and bring it gently back to a simmer, whisking constantly and rapidly to prevent sticking and scorching. Cook for a couple of minutes, always stirring, until thickened and glossy, then remove the custard from heat and strain through a fine sieve into a medium bowl.
3. Place the bowl with the hot custard onto the prepared water bath and keep stirring with the whisk until the custard has cooled to room temperature. If you are not going to use the custard immediately, gently press a piece of cling wrap directly onto the surface, then cover the container with another piece of cling wrap and store in the refrigerator for up to three days. You will need to loosen the cold custard with a whisk before using.
.
.
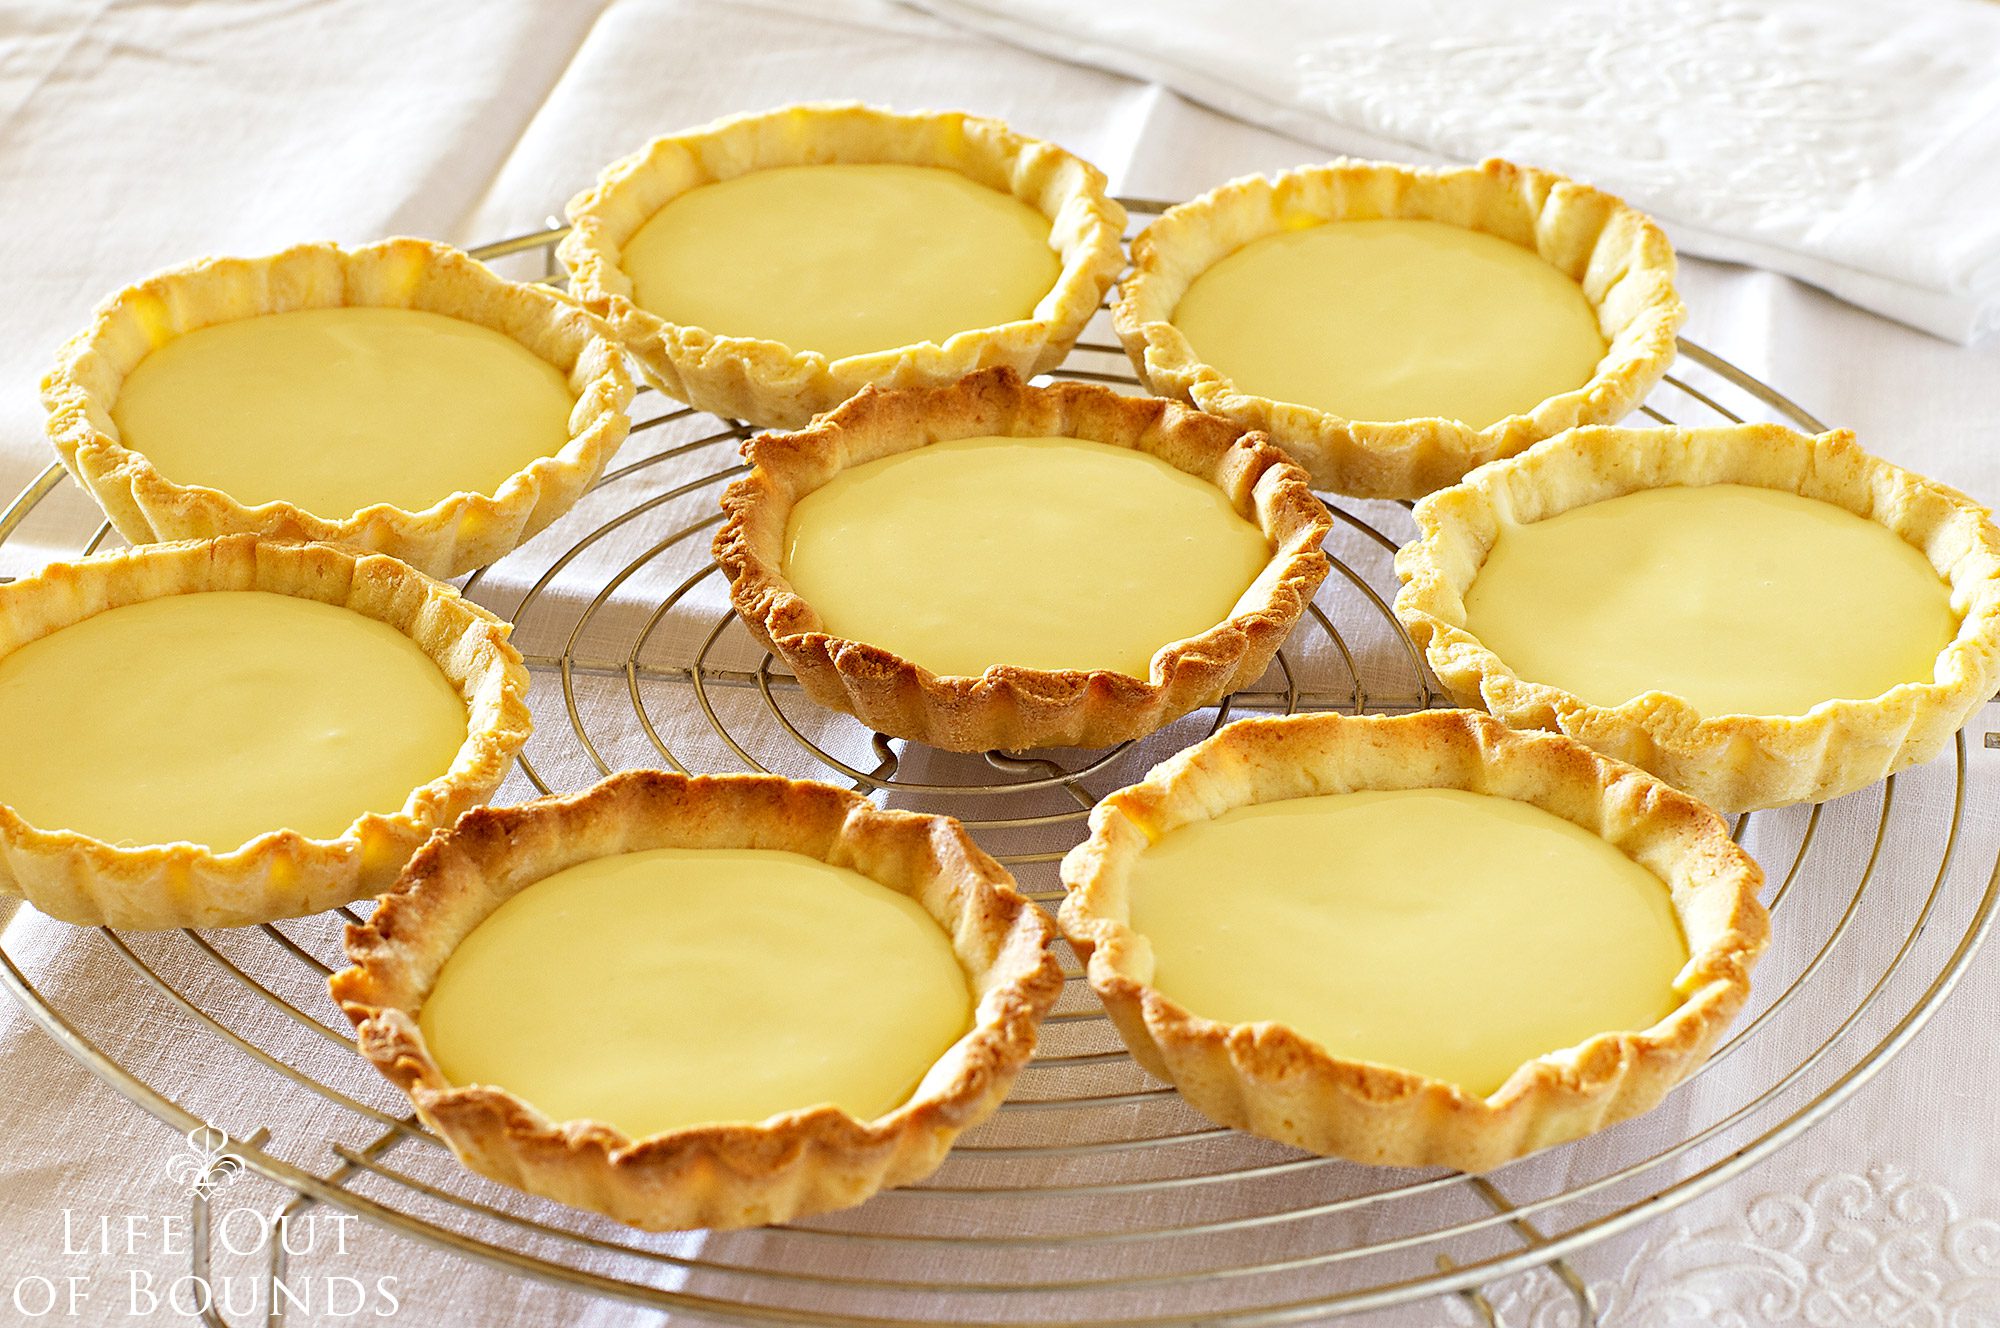
ASSEMBLING THE TARTLETS
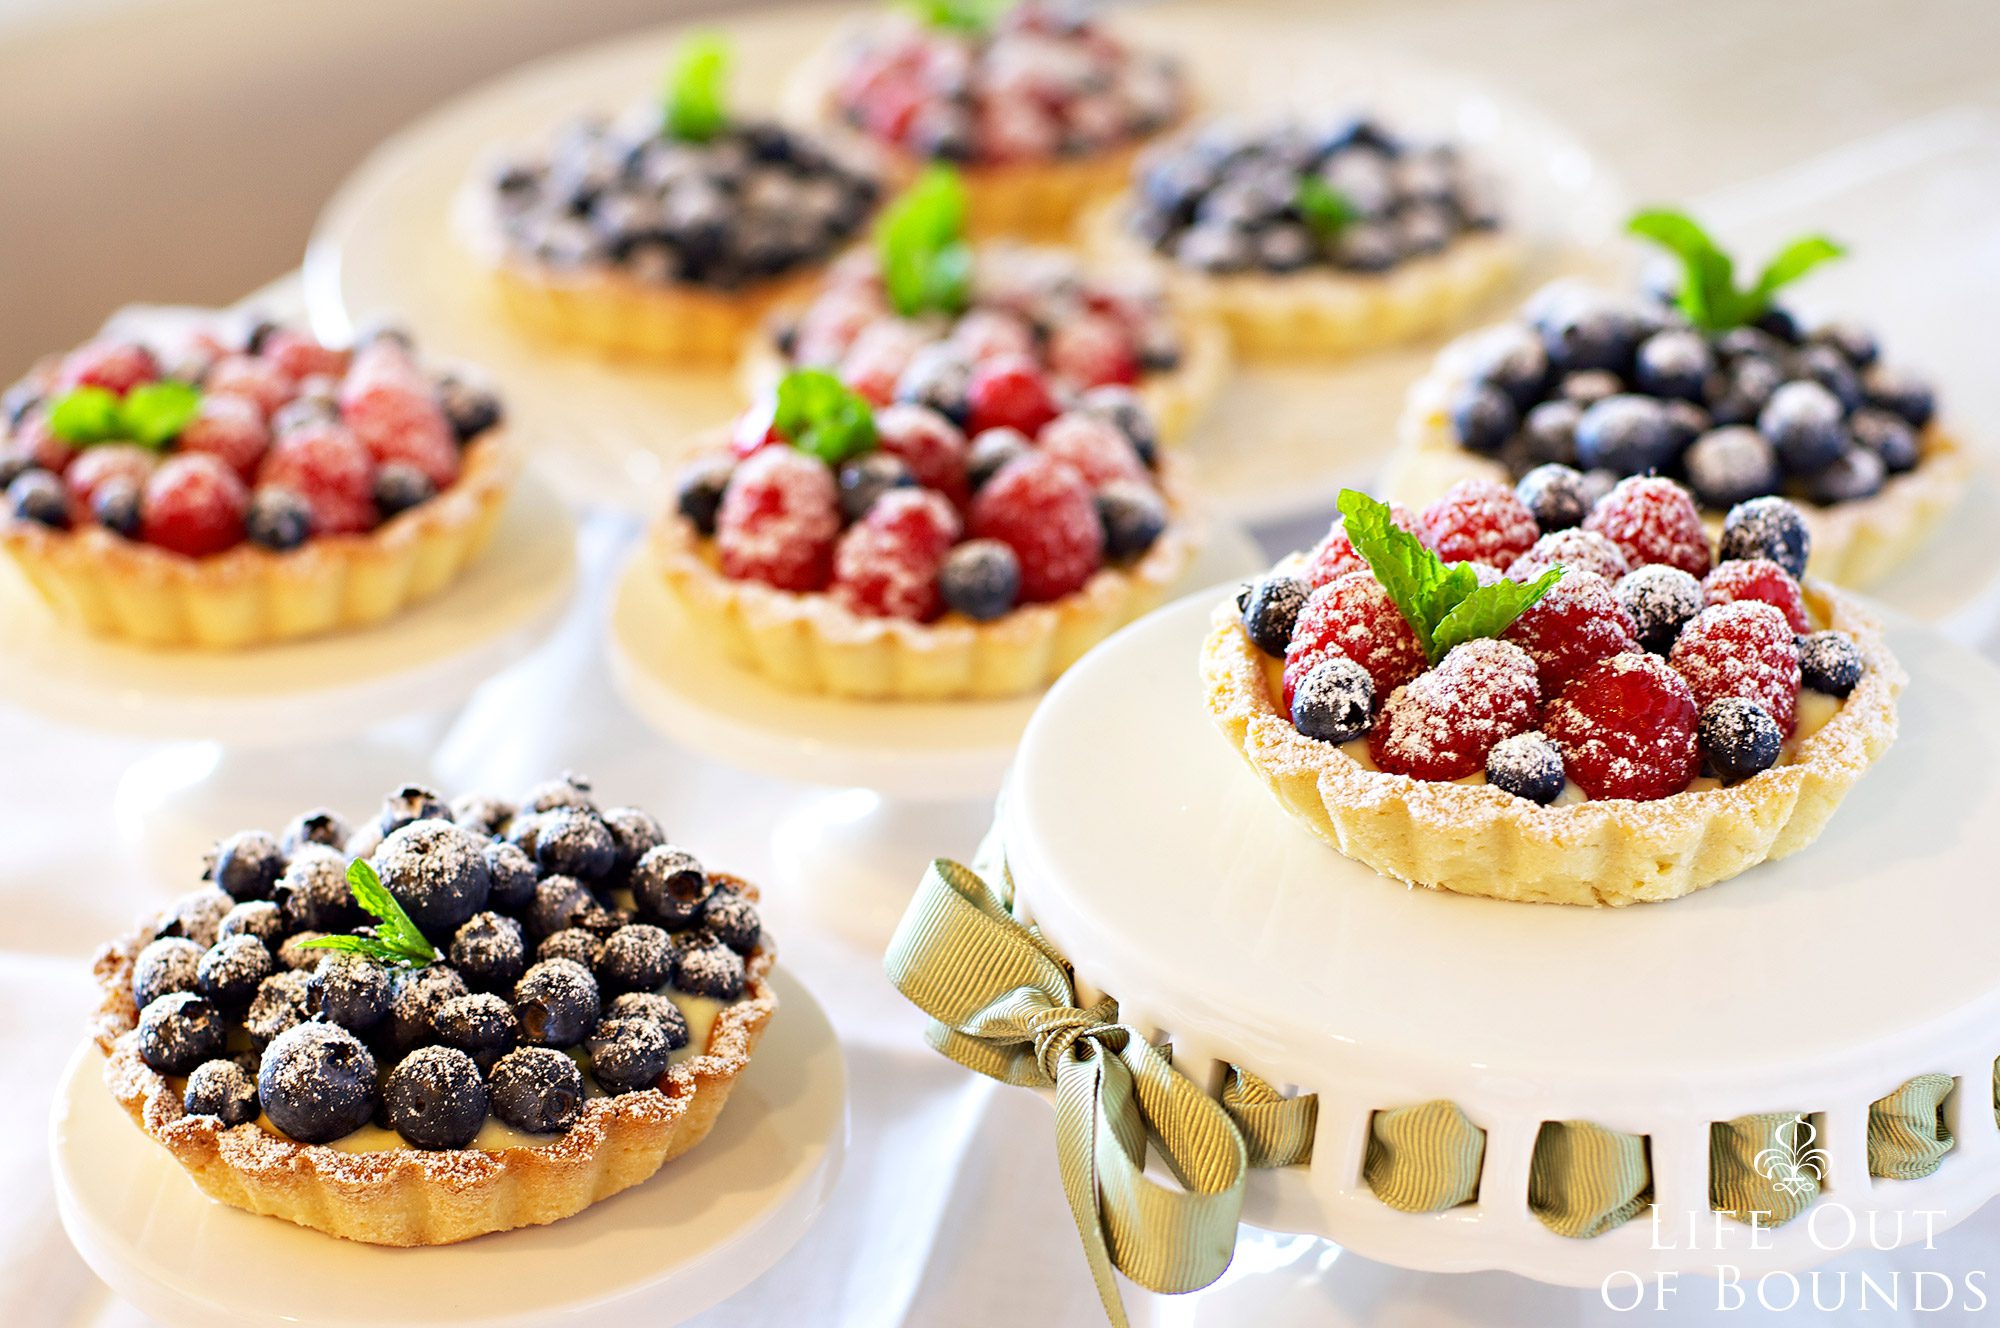
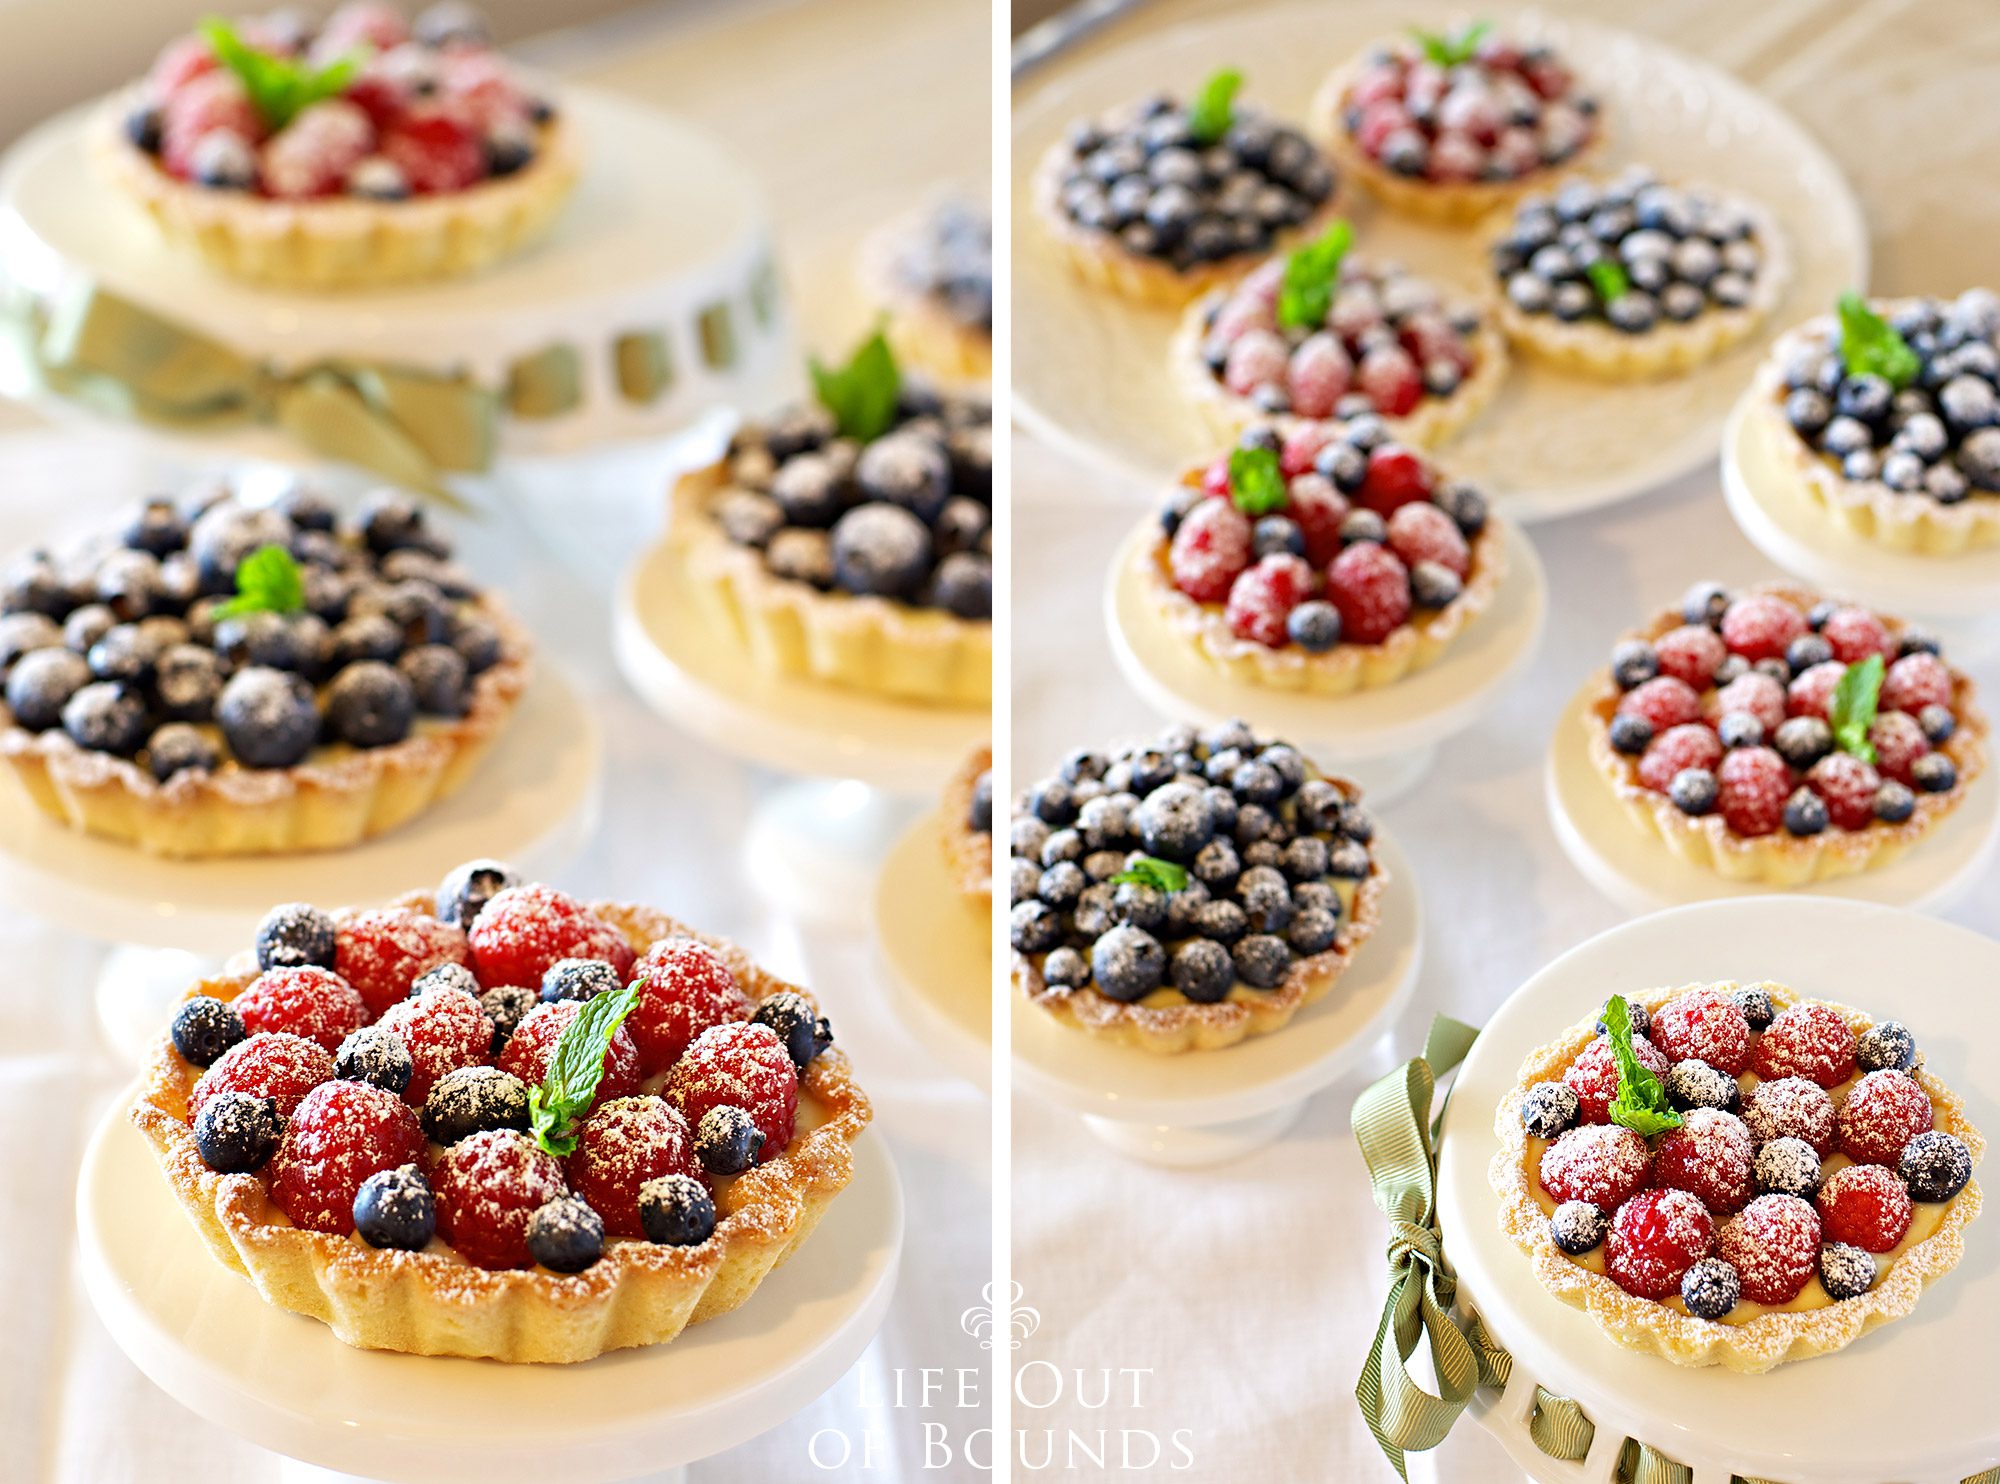
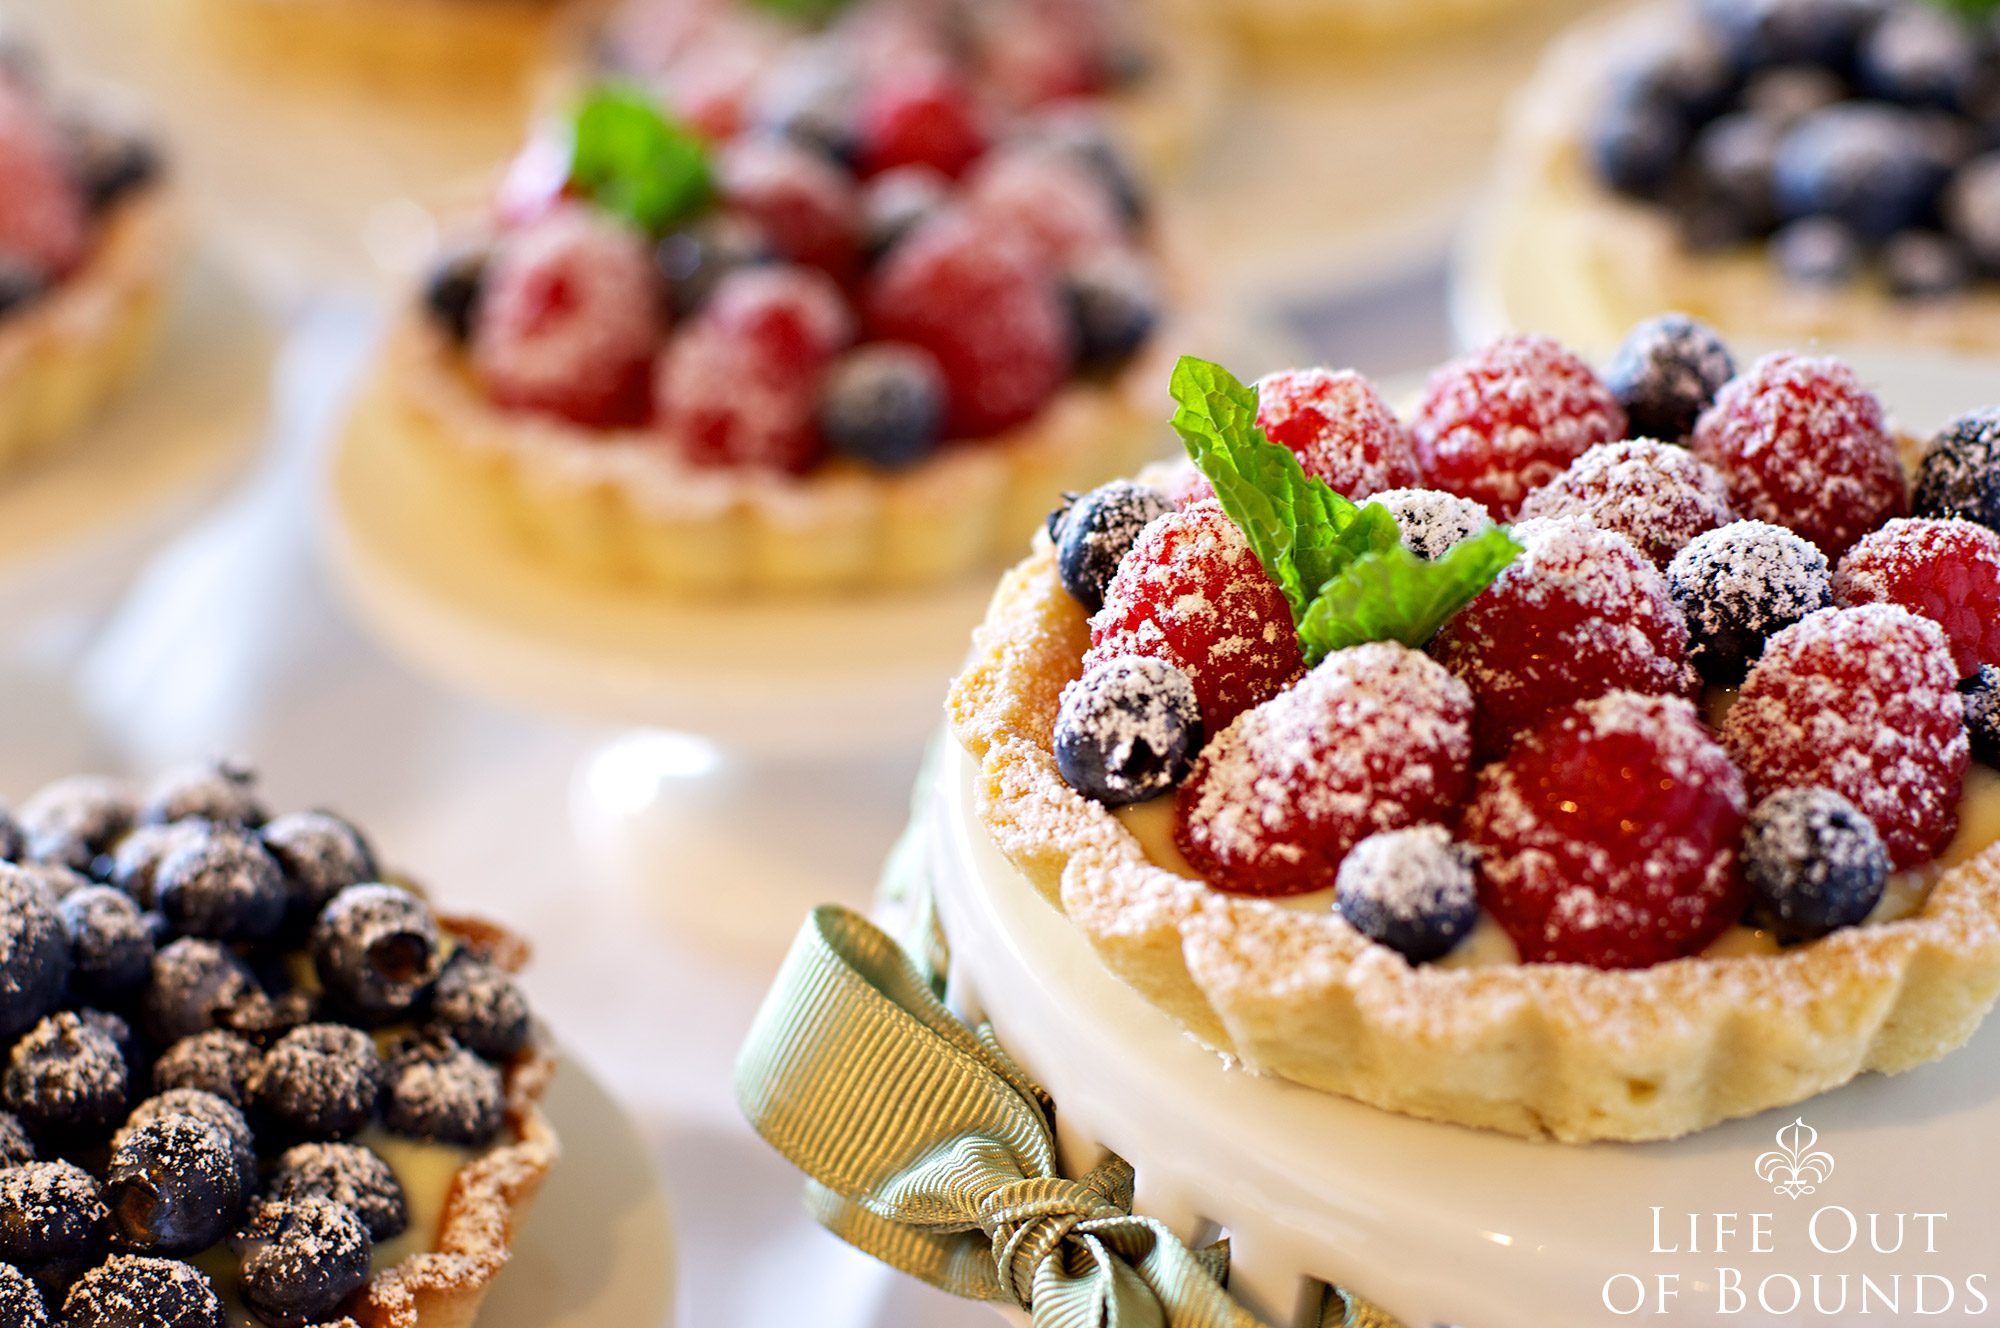
Using a spoon or a pastry bag, place enough custard in each tartlet shell. Top with the fruit in whichever style you like. Dust with powder sugar, decorate with fresh mint leaves and serve.
The finished tartlets with last about 3-4 days if covered in the refrigerator. It all depends on the freshness of the fruit, which are best purchased on the same day in which you are going to use them.
My plan was to use raspberries, blueberries and blackberries, but there were no blackberries to be found that morning.
.
.
Do you like fruit tarts like these? Or do you prefer baked fruit tarts and pies? Or maybe you are like me and like all of them!


What beautiful tarts! I find that if I’m without a camera of some kind, I always find something that I’d dearly love to photograph. Lucky phones have cameras nowadays because I always carry one.
Although it rained, it sounds like a wonderful way to pass the day! 😀 These tarts are just darling! 😀